Every guest who fills in your WiFi sign-in form is saved to your guest list, whether they connected through your UniFi or Omada WiFi page or scanned a WiFi QR code. You can look through the list, see who agreed to marketing, and download it as a CSV file for your email tool.
Find your guest list
- In the members area menu, click Wifi Devices (under Devices).
- In the Sections list, click Guest marketing. On a phone, tap Marketing in the strip at the top.
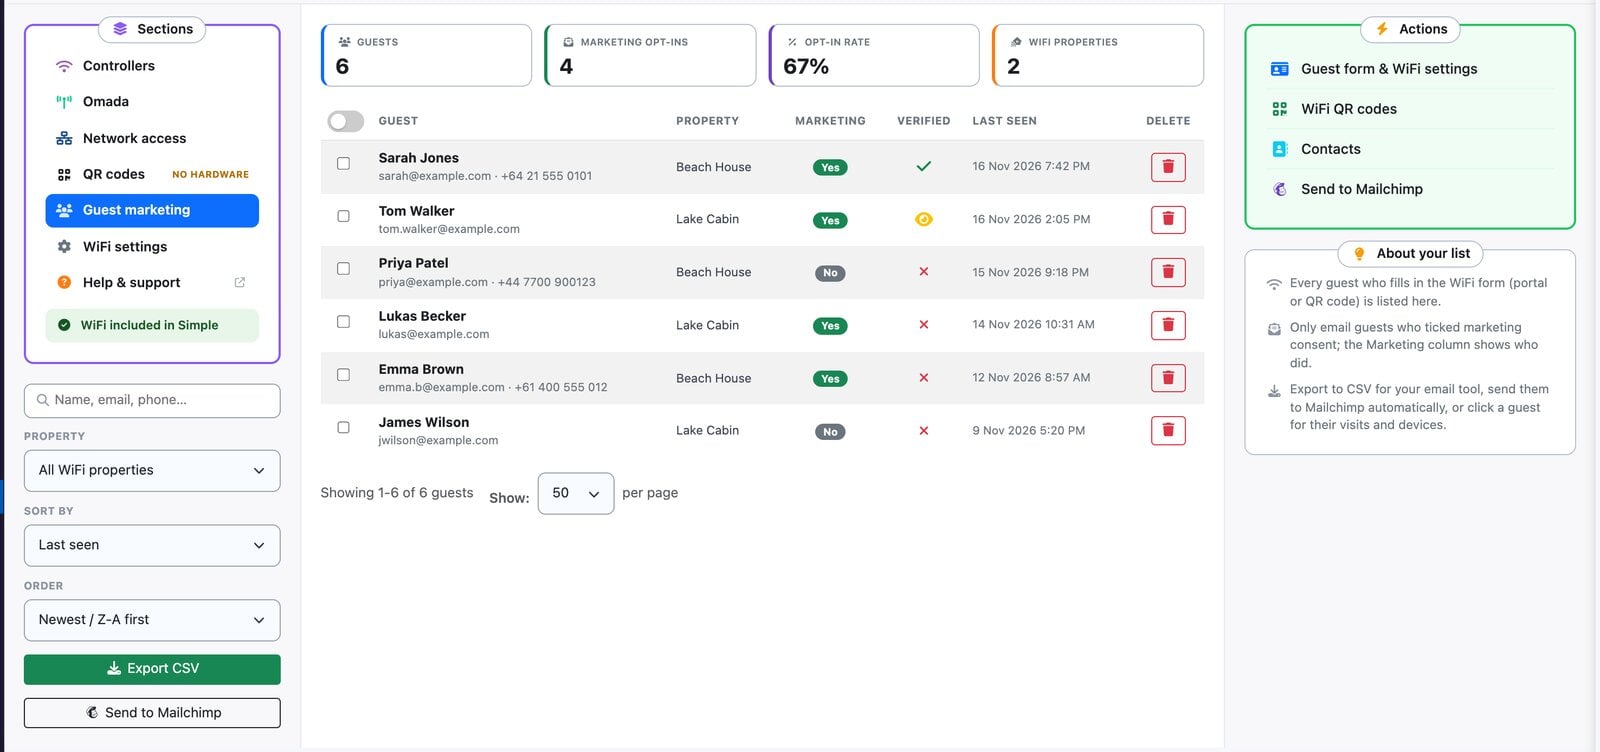
The boxes at the top show how many guests you have, how many agreed to marketing, your opt-in rate and how many of your properties have WiFi access points set up.
Who is on the list
Everyone who signs in is listed, not just the guests who agreed to marketing. Each guest appears once per property, matched by their email address. When they sign in again (a new device, or a return stay) their row is updated with their latest details, rather than added twice.
Each row shows:
- Guest: their name, email address and phone number (if your form asks for it). If you use guest WiFi speed tiers, a badge shows their speed: Full speed, Standard speed or Pass until a date.
- Property: where they signed in.
- Marketing: Yes if they agreed to receive updates and promotions on their latest sign-in, No if they didn’t.
- Verified: only useful if you’ve turned on email verification in your WiFi settings. A green tick means they clicked the link in the verification email, an eye means they opened the email but haven’t clicked the link yet, and a red cross means they haven’t verified.
- Last Seen: the last time they signed in.
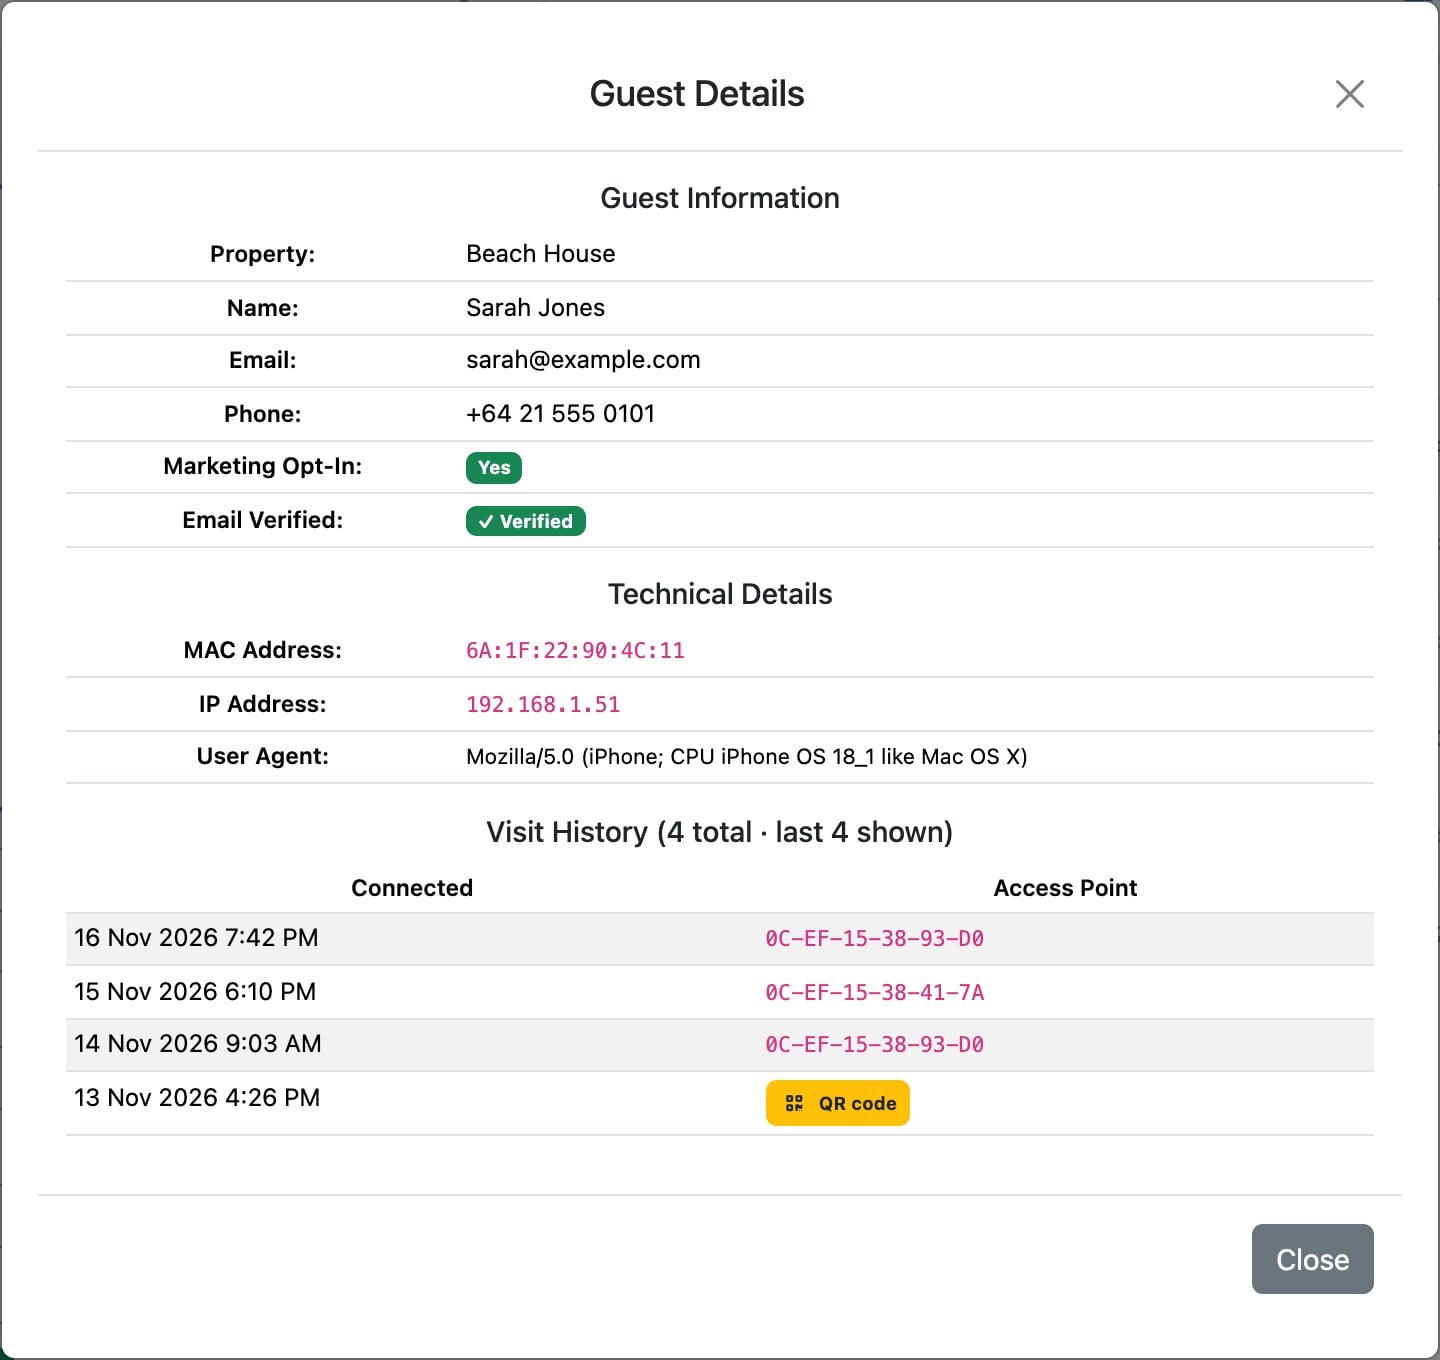
Click a guest to see more: their device’s MAC address, IP address and browser, how many times they’ve signed in, and their most recent visits with the access point they used (or QR code if they scanned one).
Only email guests who said Yes
The list includes guests who didn’t agree to marketing, so check the Marketing column (or the Marketing Opt-In column in the CSV) before you send anyone a promotion.
How guests are asked depends on your guest form settings, and the rules on marketing consent depend on where you and your guests are, so check what applies to you.
A guest’s latest sign-in decides their answer: if they say No on a later visit, their row changes to No.
Search, filter and sort
The controls on the left change the list straight away:
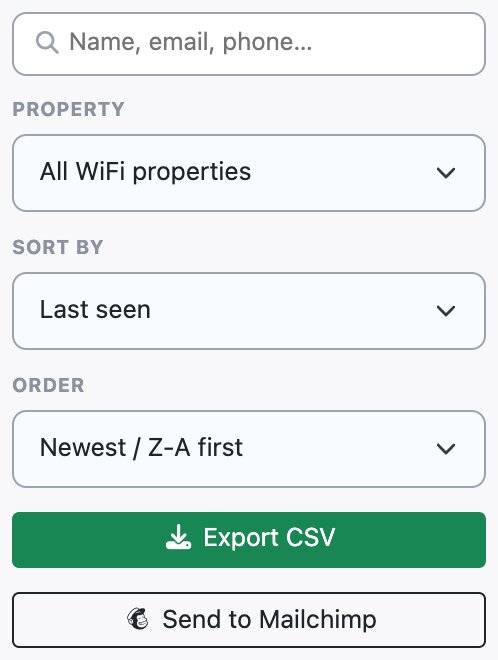
- Search: type part of a name, email address, phone number or property name.
- Property: show the guests of one property, or All WiFi properties.
- Sort by: Last seen, First seen, Name, Email or Property, with Order set to Newest / Z-A first or Oldest / A-Z first.
- Under the list, Show sets how many guests appear per page: 25, 50, 100, 200 or All.
Export your guests to CSV
- Pick a property in the Property filter if you only want that property’s guests. Leave it on All WiFi properties for everyone.
- Click Export CSV. A file called
wifi_guests_plus today’s date downloads, ready to open in Excel, Google Sheets or Numbers, or to import into your email tool.
The file has every matching guest (all pages, not just the one on screen), newest first, with these columns:
- Property Name and Property Address
- Guest Name, Email and Phone
- Marketing Opt-In (Yes / No)
- Email Verified (Yes / No)
- Last Seen
- Total Visits: how many times they’ve signed in
- Email Opened: whether they opened your verification email (Yes / No)
The export uses the Property filter only. The search box and sort order don’t change what’s in the file, and guests who said No to marketing are included, so filter on Marketing Opt-In in your spreadsheet if you only want the ones who agreed.
Send guests to Mailchimp automatically
Rather than exporting and importing a CSV by hand, click Send to Mailchimp under Export CSV. Once it’s connected, new guests go across to your Mailchimp audience every 5 minutes. By default only guests who agreed to marketing are sent. See Send your WiFi guests to Mailchimp.
Delete guests
Click the red bin on a guest’s row to delete them, for example if a guest asks you to remove their details. To delete several, tick the box at the start of each row (or switch on the toggle in the header to select the whole page) and click Delete Selected. Deleting removes all of that guest’s visit records for that property and can’t be undone, so export first if you want to keep a copy.