Guests on your Omada guest WiFi normally get online by signing in through your WiFi page. You can also let a guest straight in, or cut one off, from your dashboard. This is handy when a guest’s phone won’t show the sign-in page, or when you need to remove someone from the WiFi.
Open the connected users
- Go to Devices → Wifi Devices → Omada in your dashboard.
- In the Access Points list, click the people icon in the Users column of the access point the guest is connected to. The numbers show guests / everyone connected, for example 3/3 means three guests and nobody on your private network.

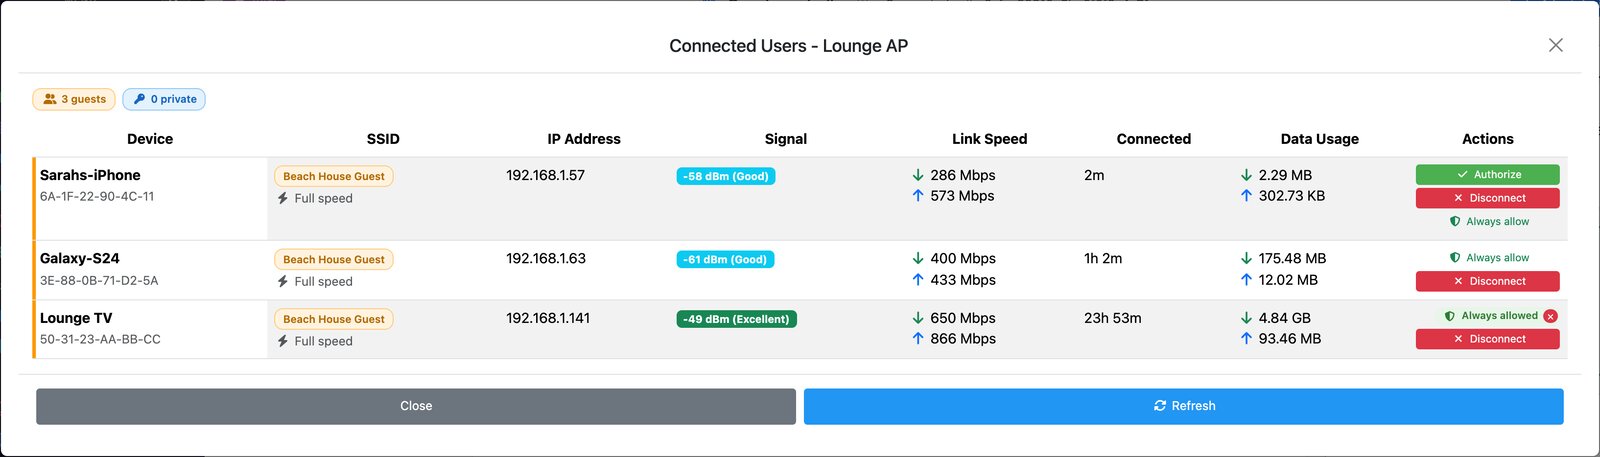
Connected Users lists every device on that access point: its name and MAC address, which WiFi network it’s on, its IP address, signal, link speed, how long it’s been connected and how much data it has used. Guests are marked with an orange bar; click Refresh at the bottom to update the list.
Authorise a guest
A guest who is connected but hasn’t signed in yet has a green Authorize button. Click it and confirm: the guest gets internet for 24 hours without going through your WiFi page. After that they’ll be asked to sign in as normal.
A manually authorised guest is still a guest: with guest isolation on, they get the internet only, not your local network.
Disconnect a guest
Click Disconnect and confirm. This signs the guest out: their phone usually stays joined to the WiFi, so it stays in the list (now with Authorize again), but it has no internet until they sign in through your WiFi page again.
Authorize or Always allow?
Authorize is for guests: 24 hours of internet, still isolated from your network.
Always allow is for your own devices, like TVs and streaming sticks: they never see the sign-in page and are never signed out, and Omada also lets them reach your local network. See How do I let devices skip the Omada guest WiFi sign-in page?