Instructions for setting up an Omada access point with the BetterSTR portal so your guests can use WiFi and you can manage the device remotely.
Setup Instructions:
-
Plug your Omada device in to power, or use Power over Ethernet (PoE). Important: Do NOT install any TP-Link/Omada apps or follow the device manual setup instructions - the device must remain in factory reset state to adopt into our system.
-
Connect the device to your router so it has access to the Internet.
-
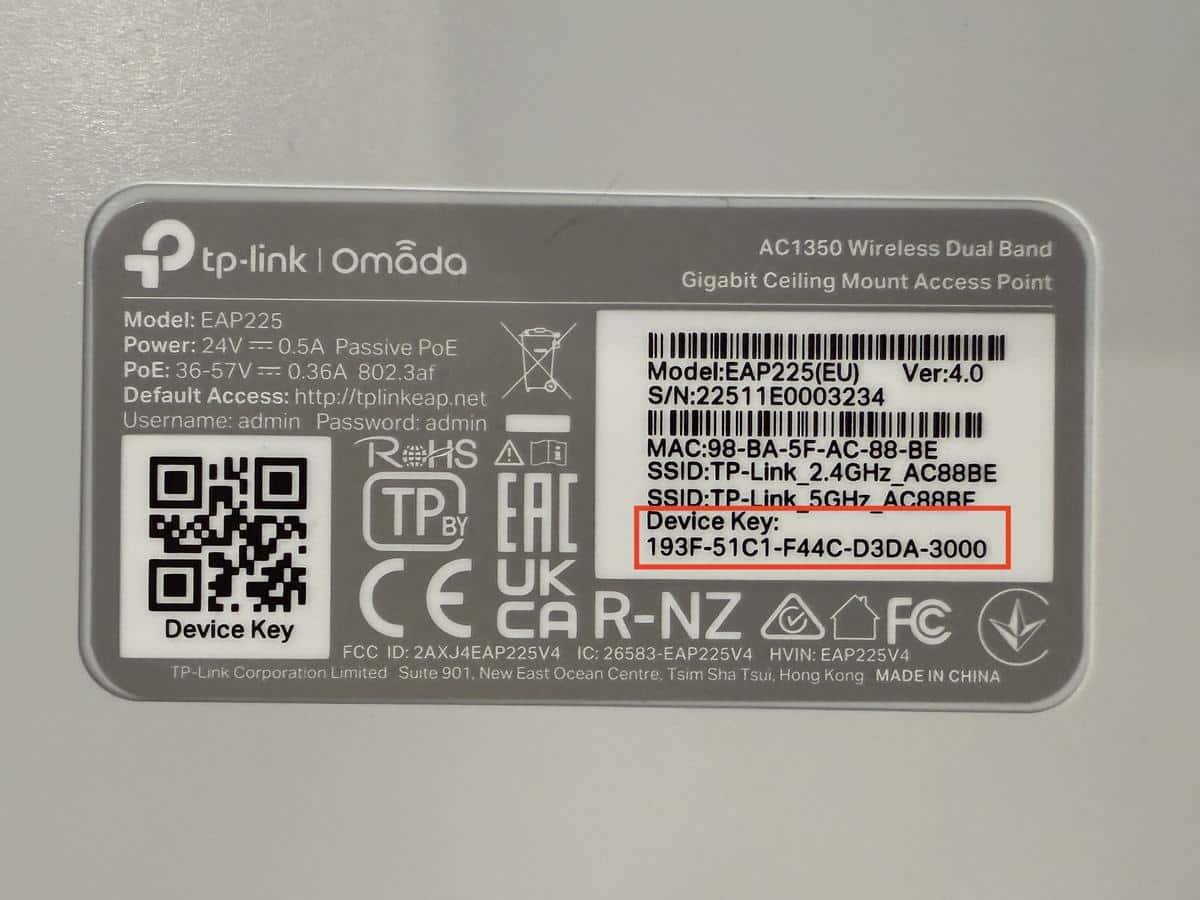
Note the Device Key printed on the sticker on the back of the device.
-
Log in to the BetterSTR Portal and navigate to Manage Wifi → https://gb.betterstr.com/members/wifi/
-
Click on Omada Controller → https://gb.betterstr.com/members/wifi/omada-controller.php
-
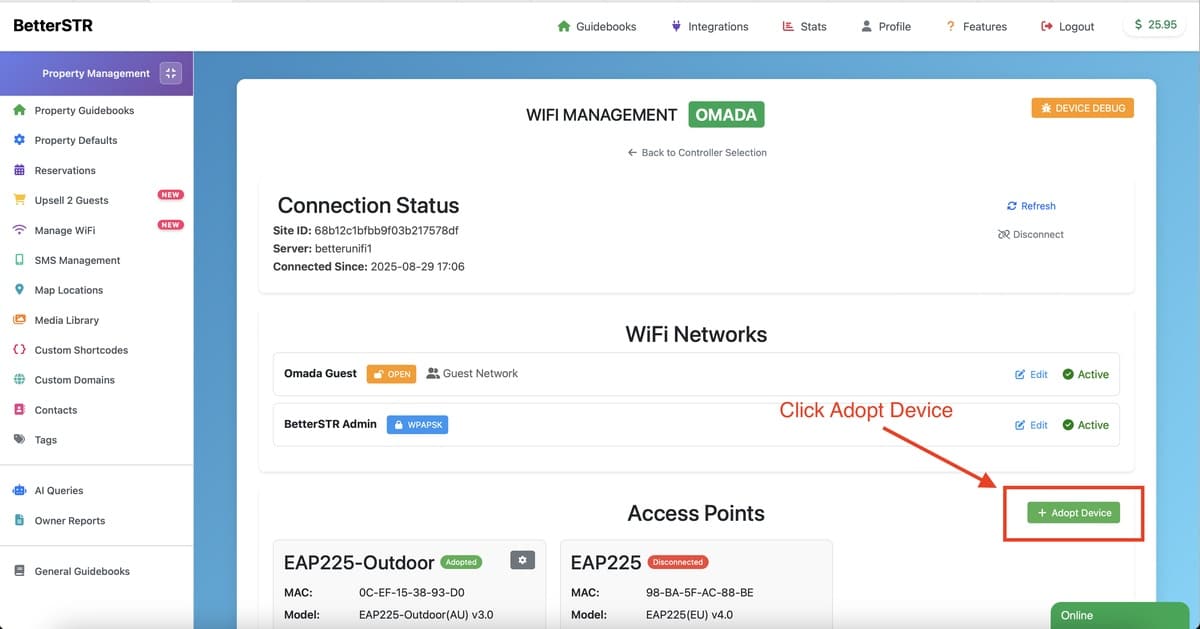
Scroll down and click Adopt Device.
-
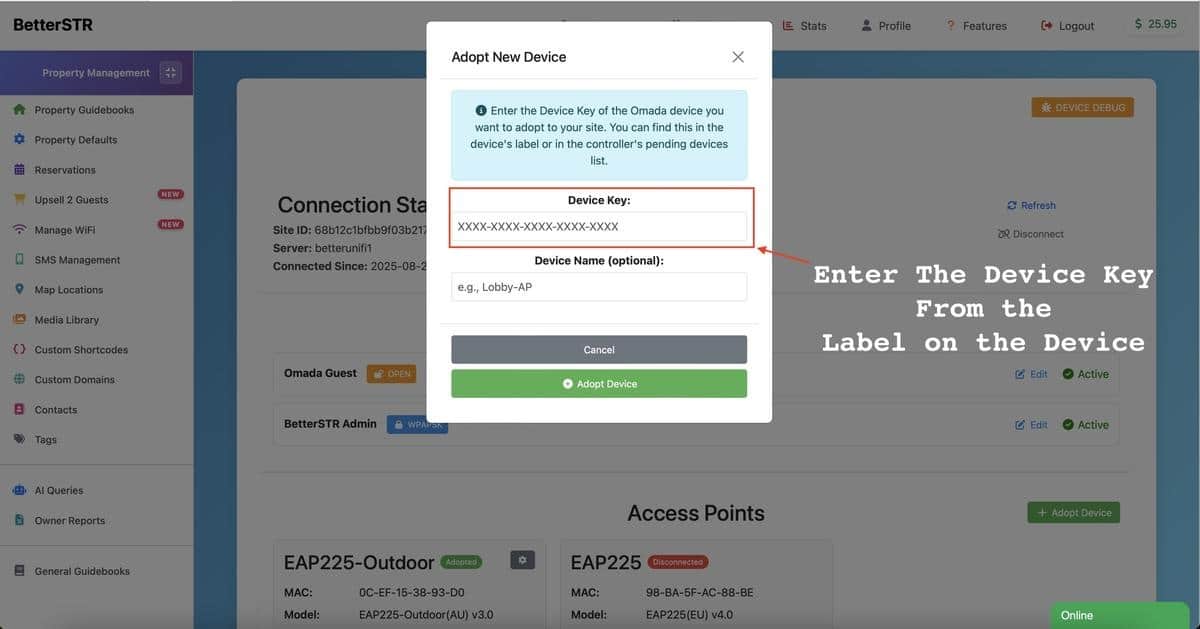
Enter the Device Key and a friendly name for the device, then click Adopt Device.
Troubleshooting: Device Won't Adopt
When you receive the device, please DO NOT follow any instructions from the device manual about installing apps or logging into the device.
To adopt the device into our system, it needs to be in a factory reset state. Do not install the TP-Link Omada app on your phone or computer to provision or configure the WiFi - otherwise it will not adopt to our platform.
This is the most common mistake: Users install the app on their phone or computer and while they don't explicitly provision or configure anything, they don't realise in the background the app actually does provision part of the device - which makes it non-adoptable in our system. If this has happened, you'll need to factory reset the device (usually by holding the reset button for 10+ seconds) before attempting to adopt again.