Connect your Mailchimp account and the guests who sign in to your WiFi go straight into a Mailchimp audience, tagged so you can email them later. No more exporting a CSV and importing it by hand. It works with the WiFi captive portal (UniFi or Omada) and the WiFi QR code sign, alongside whichever PMS you use, on every plan.
Before you start
- You need a Mailchimp account with at least one audience. A new Mailchimp account comes with one; you can also create one under Audience → All contacts in Mailchimp.
- Only the account owner, or a team member who can see WiFi guests, can connect Mailchimp.
1. Connect Mailchimp
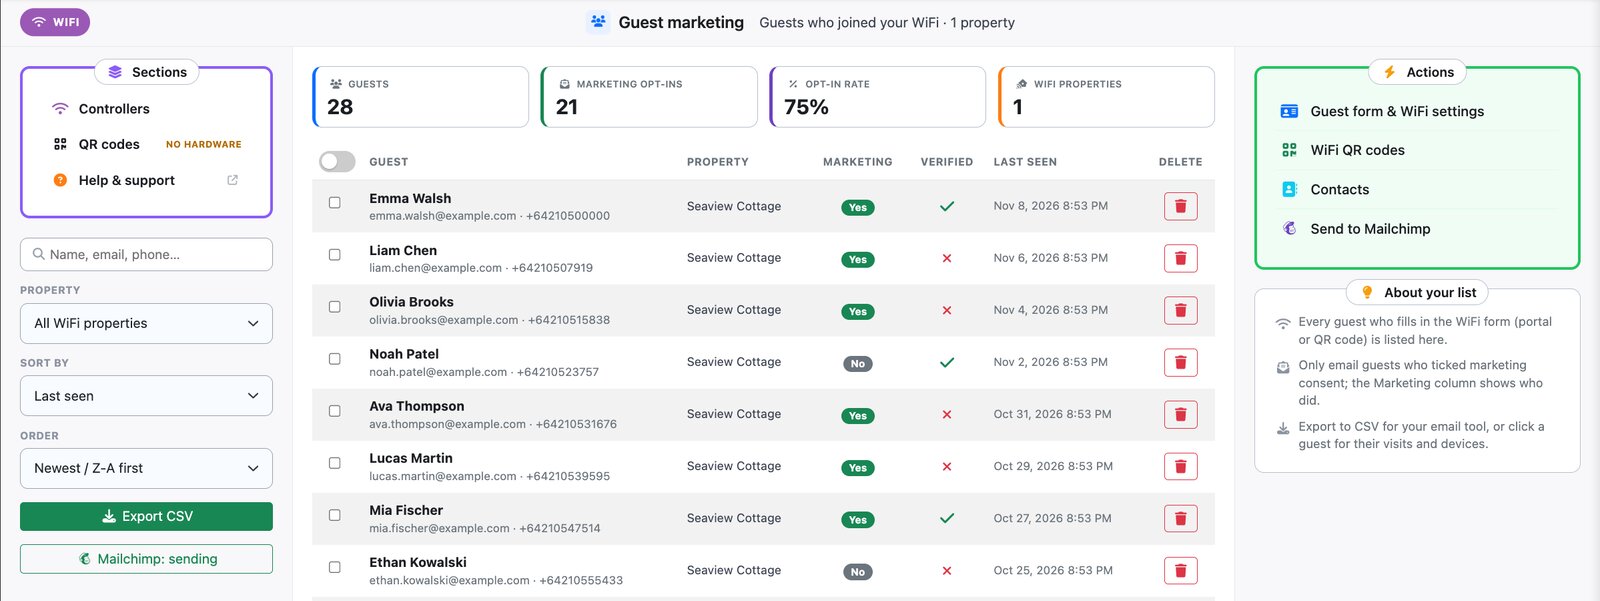
- Go to Wifi Devices → Guest marketing and click Send to Mailchimp (under Export CSV). You can also get there from Integrations → Email marketing → Mailchimp.
- Click Connect Mailchimp and sign in to Mailchimp.
- Click Allow so BetterSTR can add contacts to your audience. You come straight back to BetterSTR.
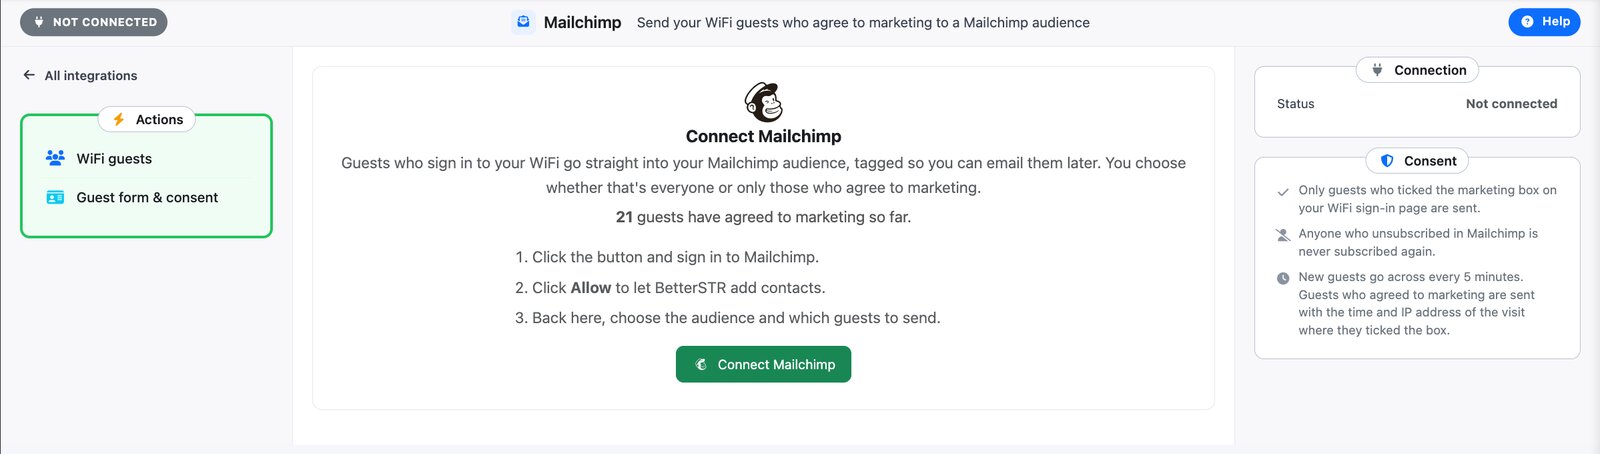
BetterSTR never sees your Mailchimp password. Mailchimp gives us a key that can only manage your audiences, and it’s stored encrypted.
2. Choose your audience and which guests to send
Back in BetterSTR, the settings appear. Pick your options and click Start sending guests.
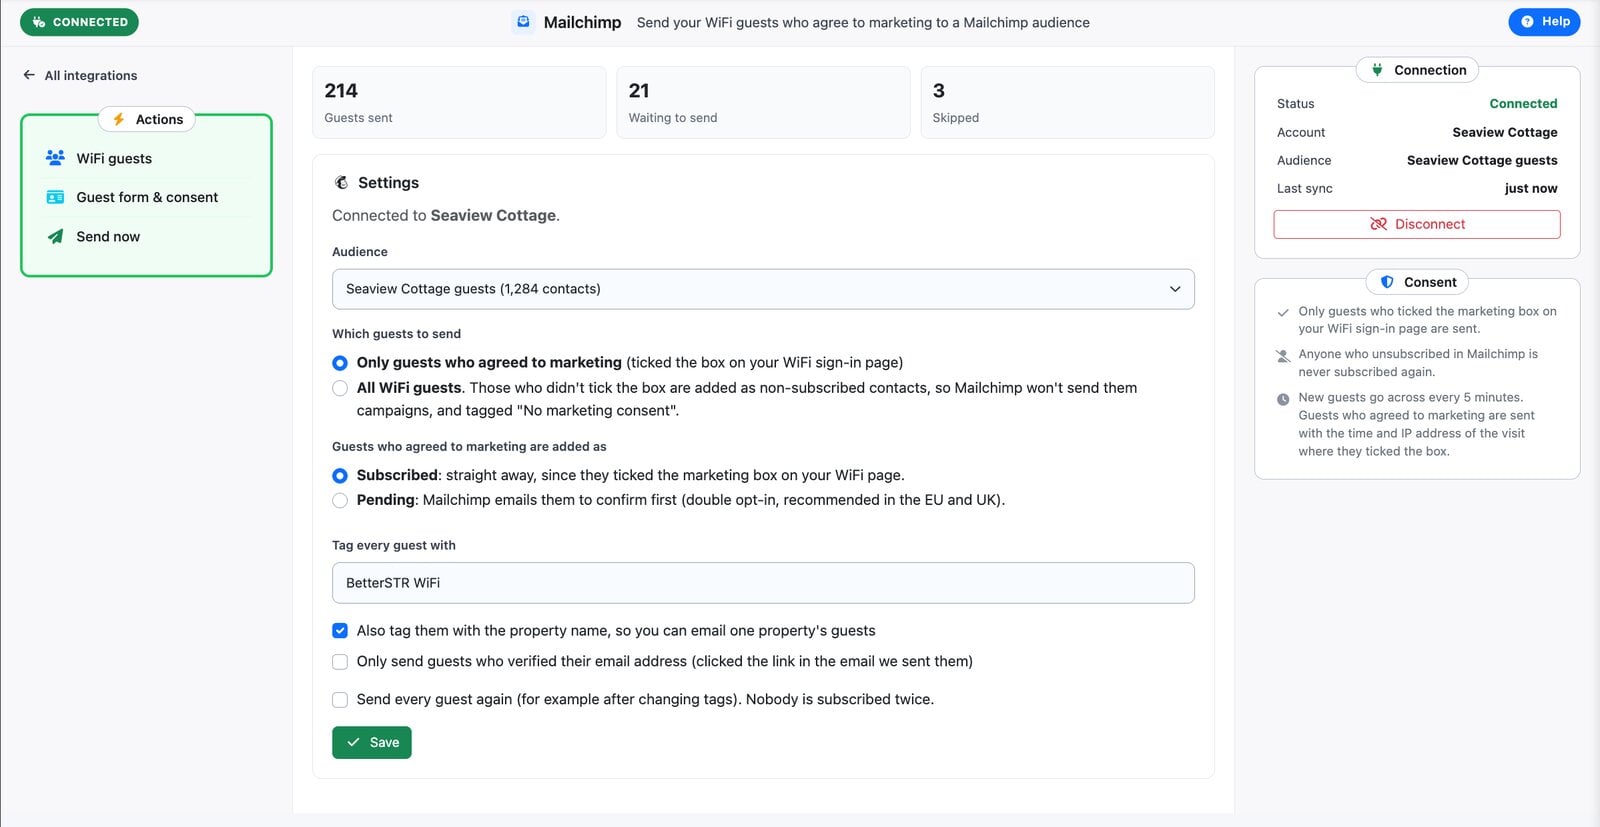
- Audience: the Mailchimp audience your guests go into.
- Which guests to send: this is your call.
- Only guests who agreed to marketing (the default) sends guests who ticked the marketing box on your WiFi sign-in page.
- All WiFi guests also sends everyone who didn’t tick it. They go in as non-subscribed contacts, so Mailchimp won’t send them campaigns, and they’re tagged No marketing consent. If they tick the box on a later visit, they’re subscribed and the tag comes off.
- Guests who agreed to marketing are added as: Subscribed straight away, or Pending, where Mailchimp first emails them to confirm (double opt-in). Pending is the safer choice if you have guests from the EU or UK.
- Tag every guest with:
BetterSTR WiFiby default. Change it, or clear it for no tag. - Also tag them with the property name: lets you email the guests of one property, for example a last-minute deal on that place.
- Only send guests who verified their email address: only guests who clicked the link in the verification email are sent. This needs email verification turned on in your WiFi settings. Guests from the WiFi QR code sign don’t verify their email, so they’re left out while this is ticked.
Mailchimp gets each guest’s email address, first and last name and phone number (where your audience has those fields), plus your tags. Guests who agreed to marketing are sent with the time and IP address of the visit where they ticked the box, so Mailchimp has a record of their consent.
3. How sending works
- New guests go across every 5 minutes. Click Send now (in the Actions box) to send straight away.
- When you first connect, everyone already on your list who matches your settings is sent, not just new guests.
- A guest who comes back for another stay is sent again, which updates their details and tags. Nobody is added twice: Mailchimp matches them by email address.
- Anyone who unsubscribed in Mailchimp is never subscribed again, even if they tick the box on a later visit. Mailchimp stays in charge of unsubscribes.
- The boxes at the top show how many guests have been sent, how many are waiting, and how many were skipped (an address Mailchimp won’t accept, for example a fake one).
On the Guest marketing page, the button under Export CSV shows the connection at a glance: Mailchimp: sending when it’s working, Mailchimp: finish setup when no audience is chosen yet, and Mailchimp: reconnect if Mailchimp has stopped accepting our access.
Changing your settings later
Changing the audience, switching to All WiFi guests or unticking verified only sends your whole list again with the new settings. To resend everyone after changing tags, tick Send every guest again and click Save.
Mailchimp counts every contact in an audience, including non-subscribed ones, towards your Mailchimp plan’s contact limit. Keep that in mind before choosing All WiFi guests on a large list.
Reconnecting or disconnecting
- If you remove BetterSTR from Mailchimp, or Mailchimp stops accepting our access, the page shows Reconnect Mailchimp. Sign in again and sending carries on where it stopped. Reconnecting the same Mailchimp account keeps your settings.
- Disconnect (in the Connection box) stops sending. Guests already in your audience stay there. You can also remove BetterSTR from the connected apps in your Mailchimp account settings.