Every Omada access point needs to be assigned to one of your properties. That’s how BetterSTR knows which property a guest is staying at when they join your guest WiFi, so it can show them the right sign-in form and guidebook. You do it, and rename the access point, in its Access Point Settings.
Why it matters
- Guests can’t sign in on an unassigned access point. Instead of your sign-in page they see a “WiFi Configuration Error” page saying the access point hasn’t been configured yet.
- Guests see that property’s guidebook (or your simple sign-in page, if you’ve turned on Disable Guidebook), welcomed with the property’s name.
- Guest sign-ins are saved against that property, so you can filter your guest list by property on the Guest marketing page.
- Per-property settings: the guest form override and the guest speed below only apply once the access point has a property.
- The property’s own page lists its access points, with a Configure link straight back to these settings.
Assign an access point to a property
- Go to Devices → Wifi Devices → Omada in your dashboard.
- In the Access Points list, look at the Property column. An access point without a property shows a yellow Not Assigned pill. Click it, or click the cog (Settings) button in the Actions column.

- Under Assign to Property, start typing the property’s name or address and pick it from the list.
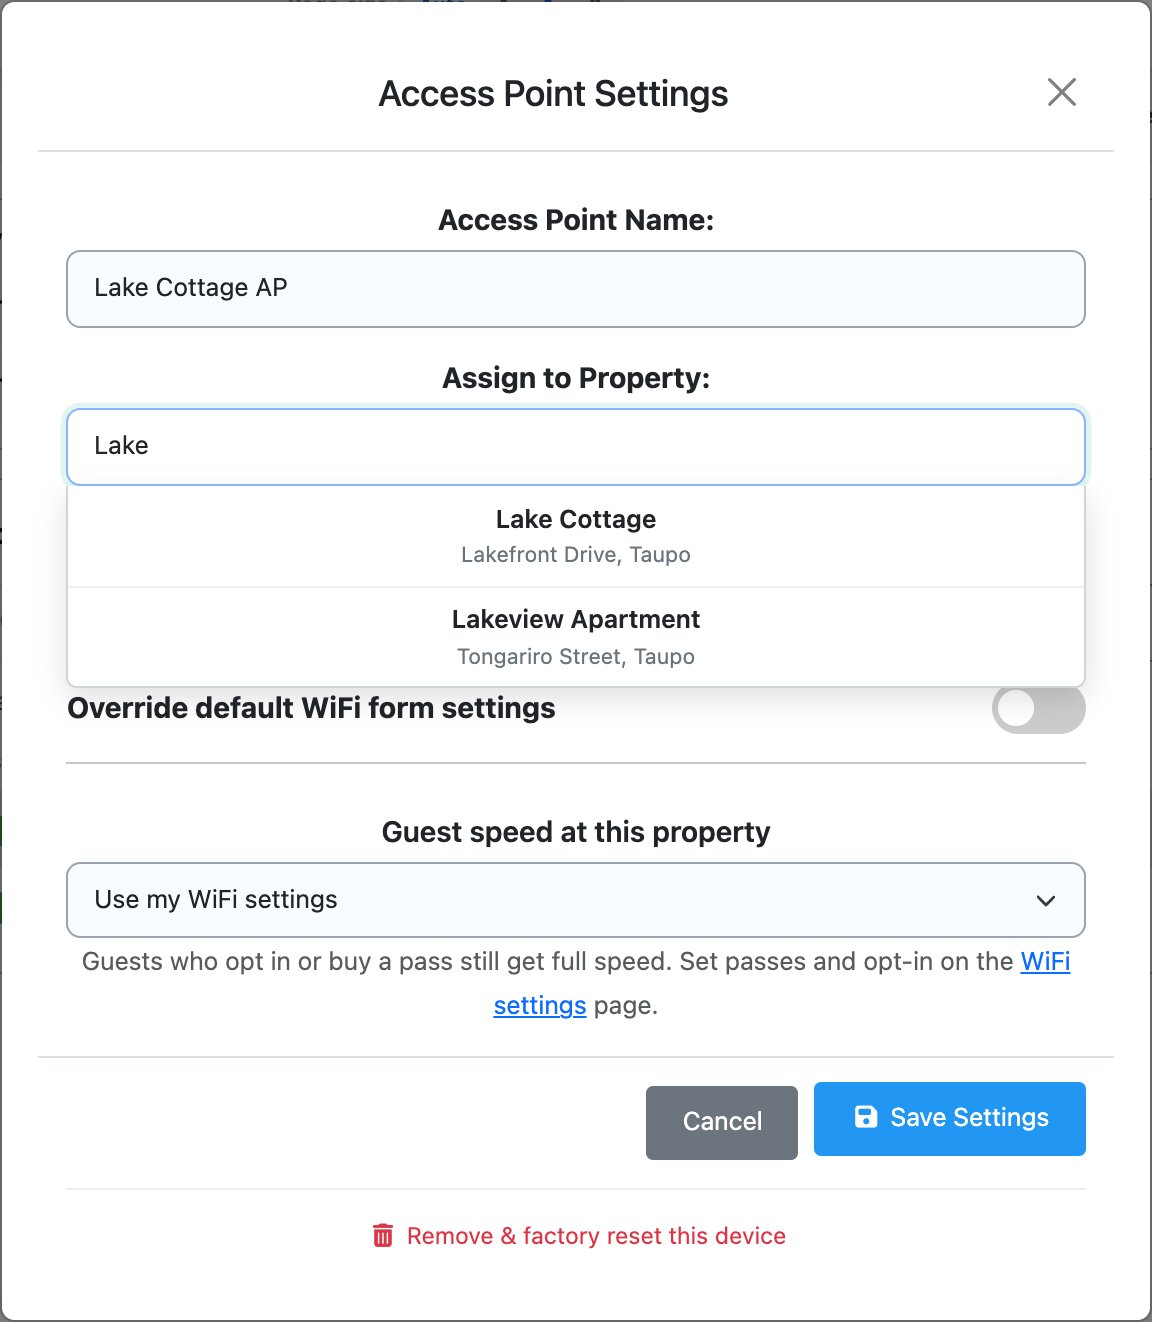
- The chosen property appears in a blue pill under the search box. While you’re here, give the access point a name you’ll recognise in Access Point Name (for example “Lake Cottage AP” or “Upstairs”).
- Click Save Settings.
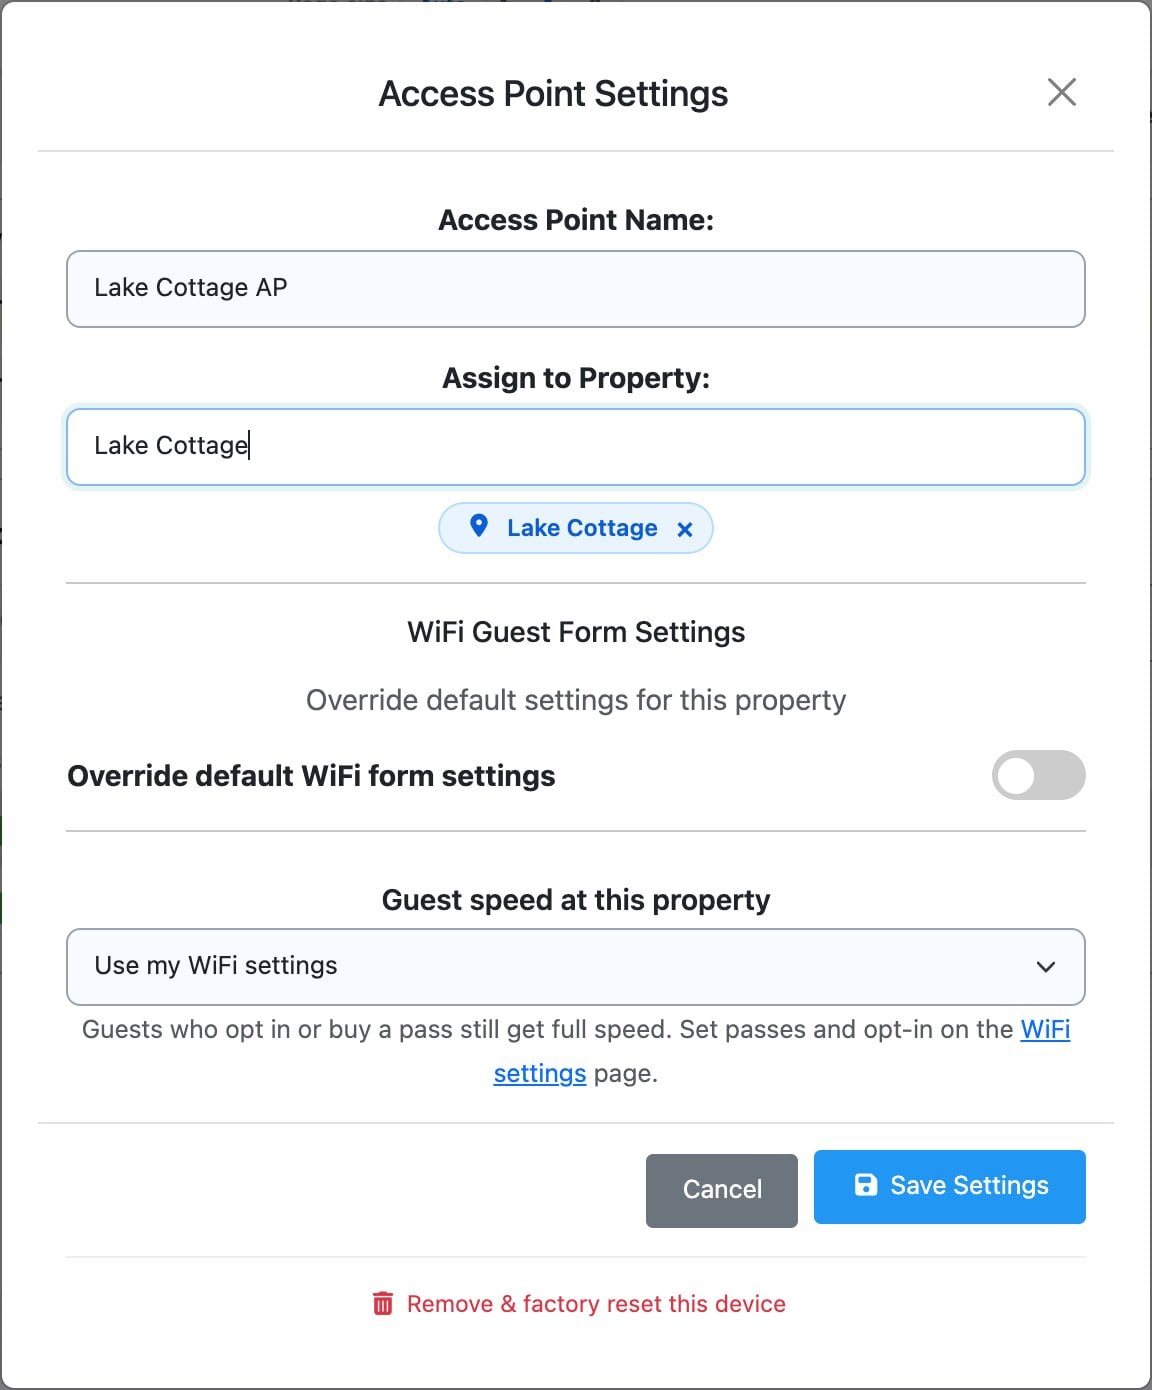
The Property column now shows the property’s name, and new guests on that access point get its sign-in page.
More than one access point at a property?
Assign each of them to the same property. Each access point keeps its own settings, so if you use the guest form override or a guest speed (below), set them the same on every access point at that property. Otherwise guests get different settings depending on which one they connect to.
Rename an access point
Open its settings with the cog, change Access Point Name and click Save Settings. The name is saved on your Omada controller and shows in the Access Points list. A name is required, so the box can’t be left empty.
Move an access point to another property
Open its settings, click the × on the blue property pill (or just search again), pick the new property and click Save Settings. You don’t need to remove or reset the access point to move it.
If you clear the property and save without picking a new one, the access point goes back to Not Assigned and guests on it can’t sign in until you assign it again.
The other settings in this window
Override default WiFi form settings
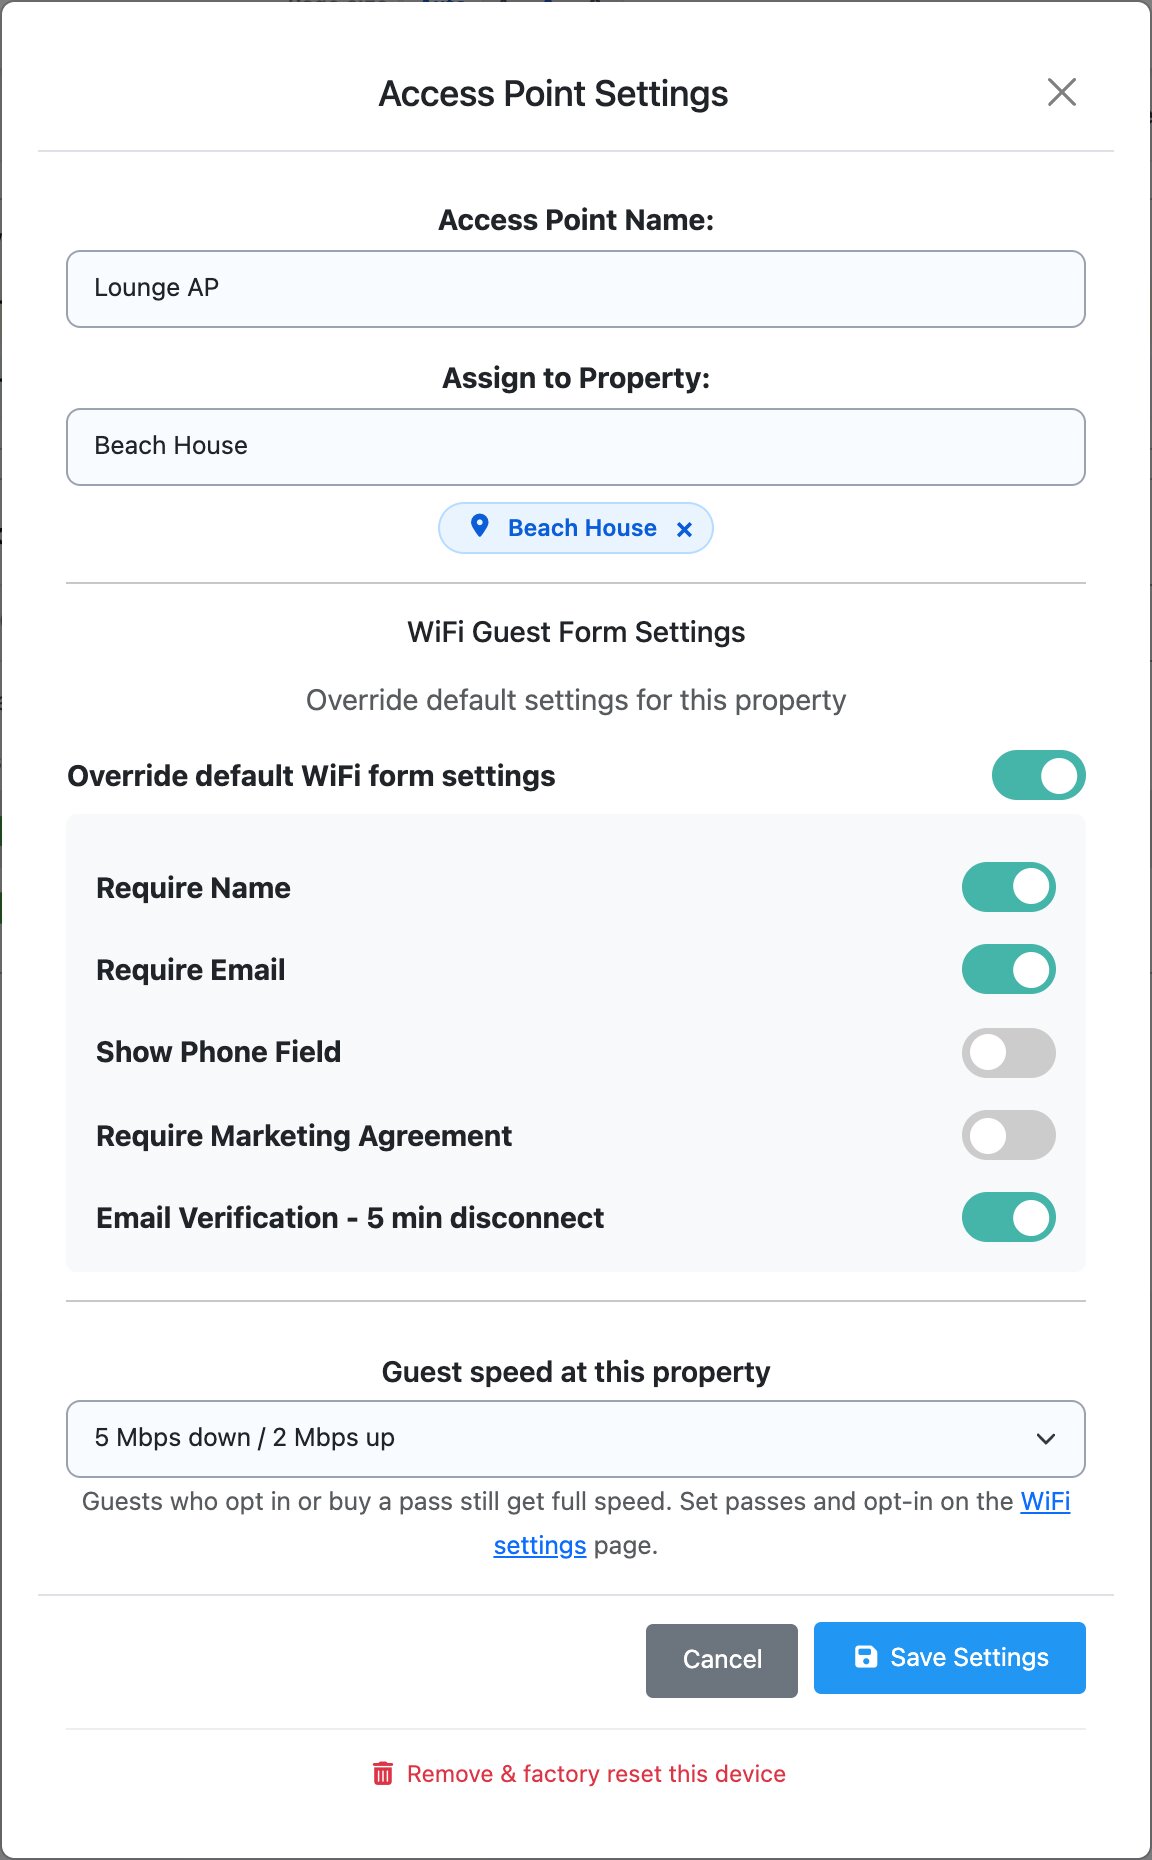
By default, guests on every access point get the sign-in form you set on the WiFi settings page. Turn on Override default WiFi form settings to choose different form fields for guests on this access point:
- Require Name
- Require Email
- Show Phone Field, and Require Phone Number once the phone field is on
- Require Marketing Agreement
- Email Verification - 5 min disconnect
When you first turn the override on, name, email and the marketing agreement start switched on; change them to suit and click Save Settings. Turn the override off and save to go back to your defaults. What each field does is explained in WiFi Guest Form Customization.
The override only works on an access point that has a property. Everything else, like the marketing wording, access code, how long guests stay connected, the redirect and the portal appearance, always comes from your WiFi settings page.
Guest speed at this property
Leave it on Use my WiFi settings to use your account’s default guest speed, or pick Full speed (no limit), 5 Mbps down / 2 Mbps up or 2 Mbps down / 1 Mbps up for guests at this property. Guests who opt in to your updates or buy a fast-WiFi pass still get full speed. This is separate from the form override, so it stays set even when the override is off. See Guest WiFi Speed for how opt-in and passes work.
Remove & factory reset this device
The red link at the bottom removes the access point from your WiFi and wipes it back to factory settings. It goes offline and has to be adopted again before you can use it. Only use it when you’re taking an access point out of service for good, never to move it between properties.