Some devices can’t use a WiFi sign-in page: smart TVs, streaming sticks, games consoles, smart speakers and other smart home gear. On UniFi guest WiFi run by BetterSTR (our hosted UniFi or your own UniFi controller) you can put these on an always-allowed list. They get internet without the sign-in page, and BetterSTR keeps them signed in. Your guests still sign in as usual.
There are two ways to add a device. Both put it on the same list.
Option 1: from the connected users on an access point
Use this when the device is already connected to your guest WiFi (it’s sitting on the sign-in page with no internet).
- Go to Devices → Wifi Devices in your dashboard and open UniFi, or Your own UniFi and then your controller.
- In the Access Points list, click the people icon on the access point the device is connected to.
- Find the device in Connected Users. TVs and streaming sticks usually show their own name; otherwise match it by its MAC address (shown under the name, and on the device’s network settings screen).
- Click Always allow in its row, give it a name if you like (for example “Lounge TV”) and click OK.
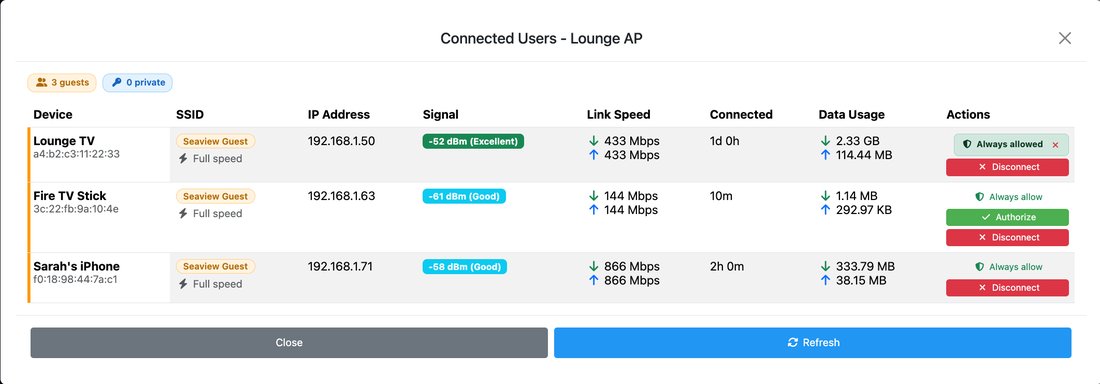
The device now shows a green Always allowed badge. If it still has no internet after a minute, turn its WiFi off and on again (or restart it) so it reconnects.
Option 2: on the UniFi network access page
Use this to add a device by its MAC address, for example before it’s even plugged in, or to see and tidy up the whole list.
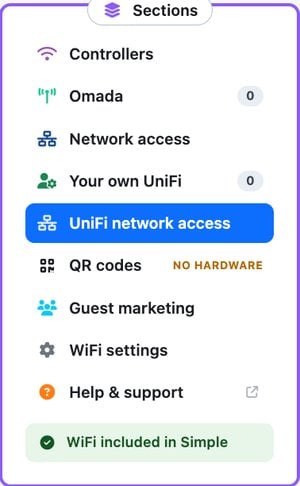
- Go to Devices → Wifi Devices and click UniFi network access in the Sections menu. If you have more than one UniFi controller, pick it from the Controller list at the top.
- Under Always-allowed devices, type the device’s MAC address (for example
50:31:23:17:29:F8; dashes work too), an optional name, and click Add.
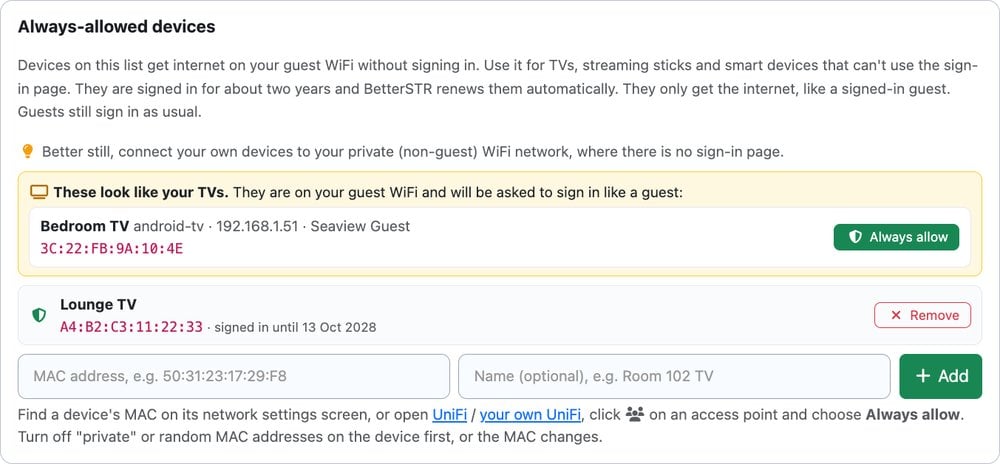
When BetterSTR spots one of your BetterSTR TVs on the guest WiFi that would be asked to sign in, it suggests it at the top of this card with an Always allow button, so you don’t need to look up its MAC.
Each device on the list shows how long it’s signed in for. UniFi has no permanent “skip the sign-in” setting, so BetterSTR signs the device in for about two years and renews it automatically well before that runs out. You don’t need to do anything.
Even better: use your private WiFi
Always-allowed devices get the internet only, just like a signed-in guest. They don’t get into your local network. If a device is yours, the simplest setup is to connect it to your private (non-guest) WiFi network instead, where there’s no sign-in page at all. Keep this list for devices that have to be on the guest network.
Finding a device’s MAC address
- Android TV / Google TV: Settings → Network & Internet → your WiFi network (or Settings → System → About → Status).
- Phones and tablets: many use a different “private” MAC address for each WiFi network. Turn that off for your guest network, or use the address shown in that network’s own settings, or simply connect it and use Option 1.
- Anything else: connect it to the guest WiFi and find it under the access point’s connected users (Option 1).
Removing a device
Click Remove next to it on the UniFi network access page, or the small red × on its Always allowed badge in Connected Users, and confirm. BetterSTR signs it out on your controller, and it will have to sign in through your WiFi page like a guest from then on.