Tags let you group properties so you can manage them together. Tag them by area (a town or region), by owner, by cleaner or by anything else that makes sense for your business. You can also tag your contacts, which links a cleaner or manager to every property with the same tag.
Once properties are tagged, you can:
- Show a map location (a café, ski field, beach and so on) on every guide in a tag, instead of all guides or just one.
- Offer an upsell product only at the properties in a tag.
- Run an automation only for properties with certain tags.
- Build a Folio (on Domains / Folios) that lists just the properties with chosen tags.
- Send cleaner texts and show a tagged contact as the host on those guides (see below).
- Give a whole group of Android TVs the same screensaver default or Live TV channel list.
- Limit a team member to the properties in certain tags (Users & Team).
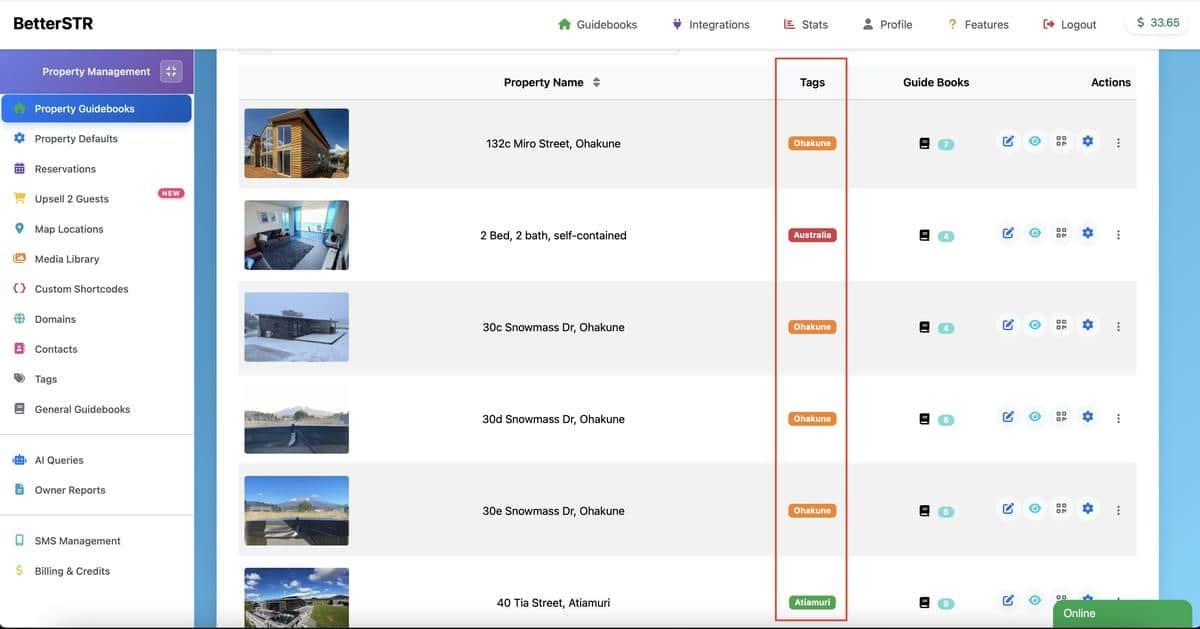
- Filter your Properties list by tag.
A property can have as many tags as you like, so tags combine well. For example, a property could be tagged Ohakune for local ski-field locations, EarlyCheckin so it offers an early check-in upsell, and OhakuneSMSCleaner so the local cleaner gets texts about it.
The Tags page
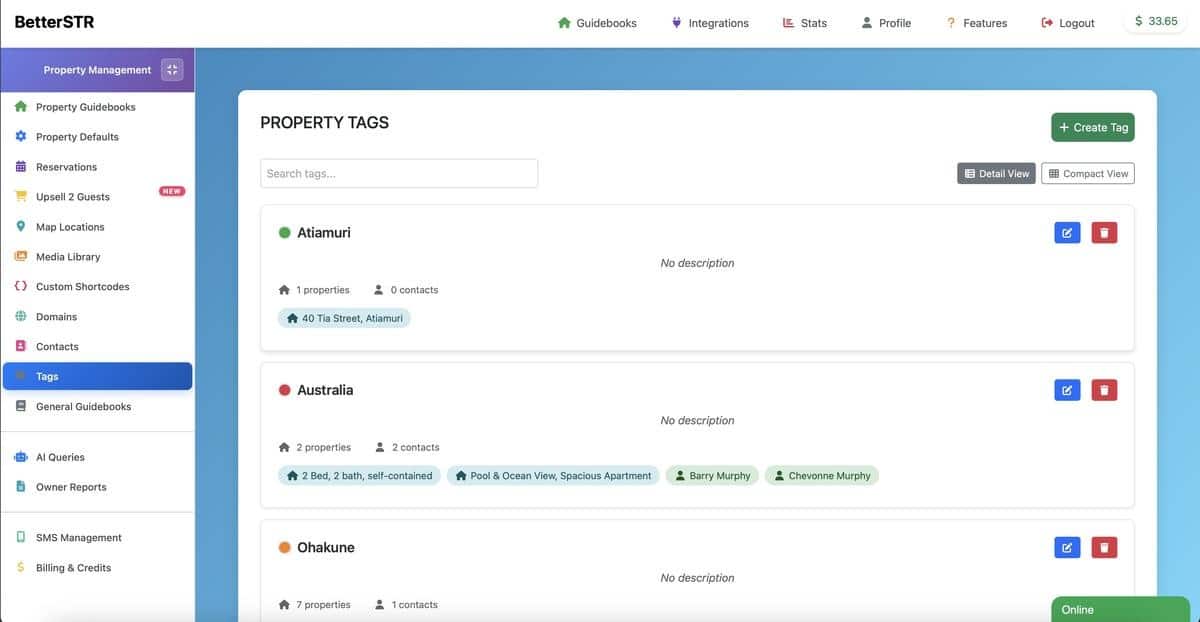
Go to Tags / Grouping in the left menu.
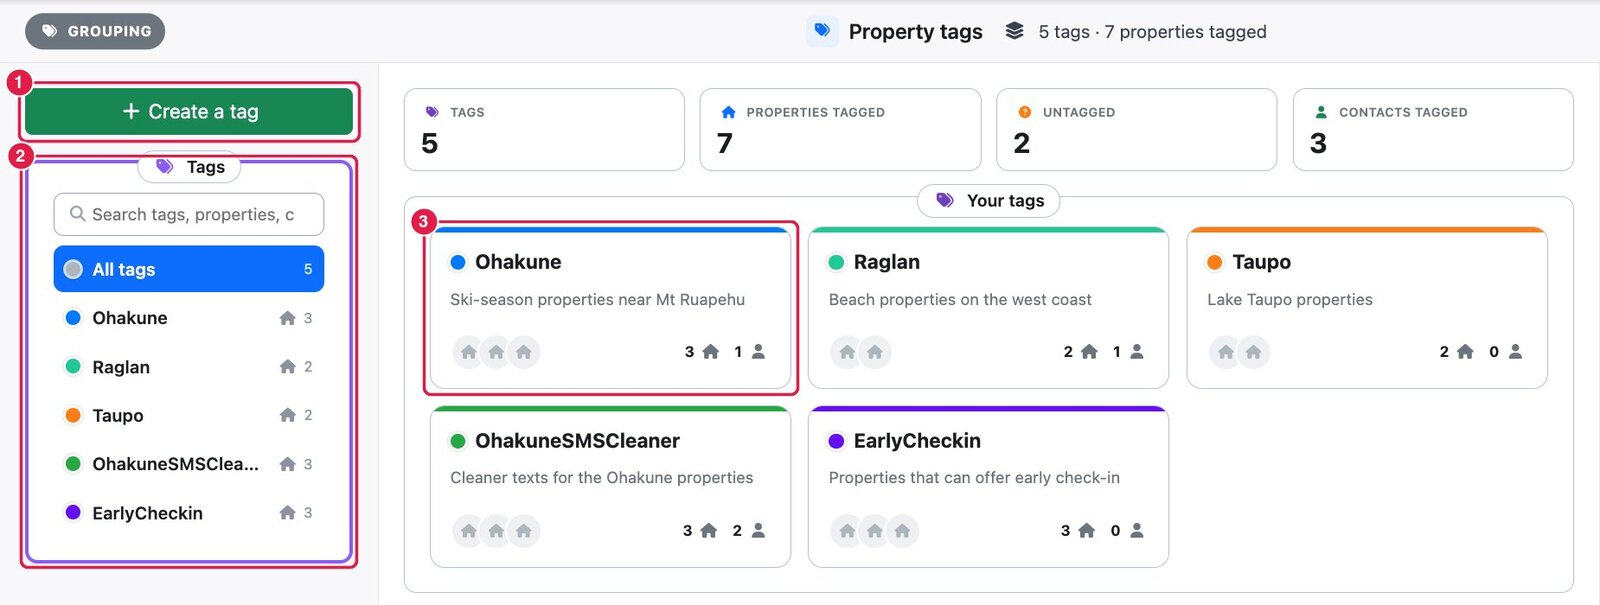
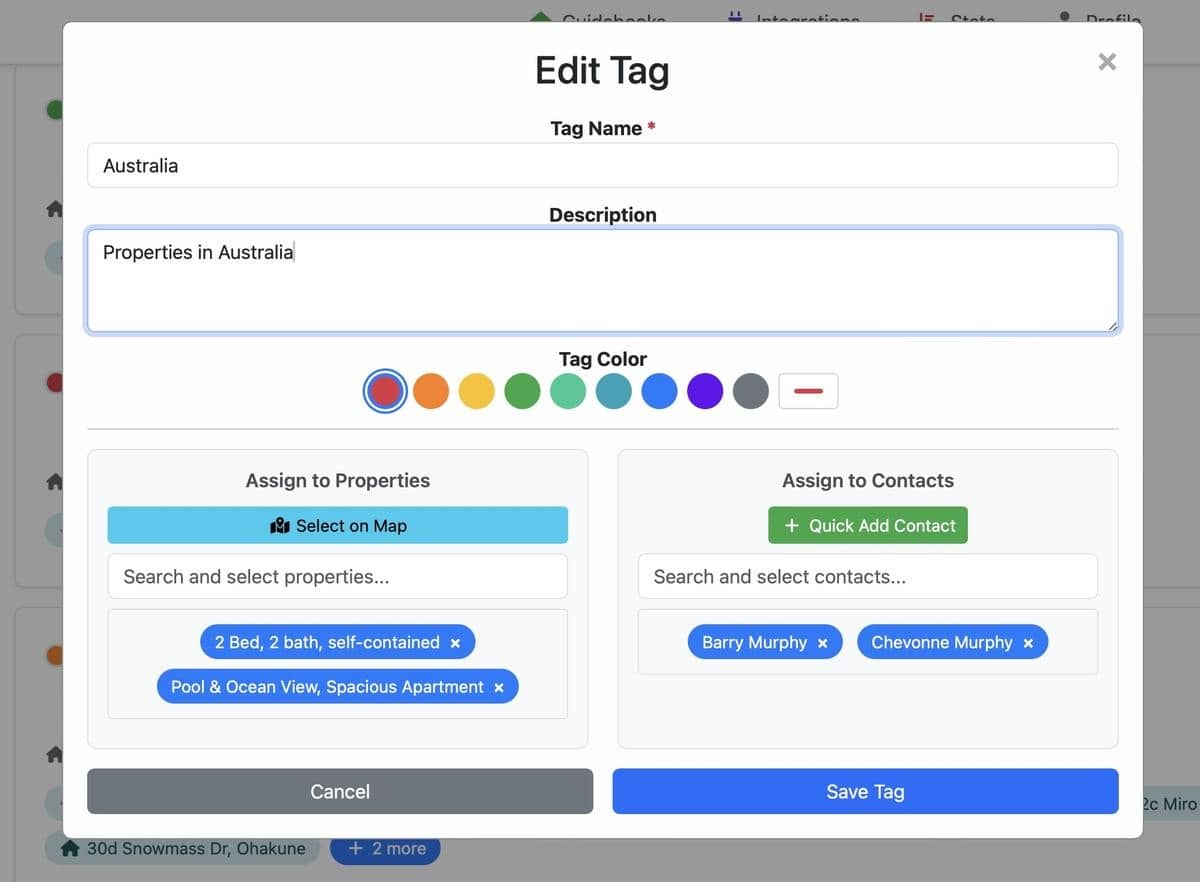
- (1) Create a tag opens the tag form.
- (2) The Tags list shows every tag and how many properties it has. The search box finds a tag by its name, or by a property or contact in it.
- (3) Click a tag card to see its properties and contacts, then Edit or delete it.
The right-hand column lists any active properties that don’t have a tag yet, so you can spot gaps.
How to create a tag
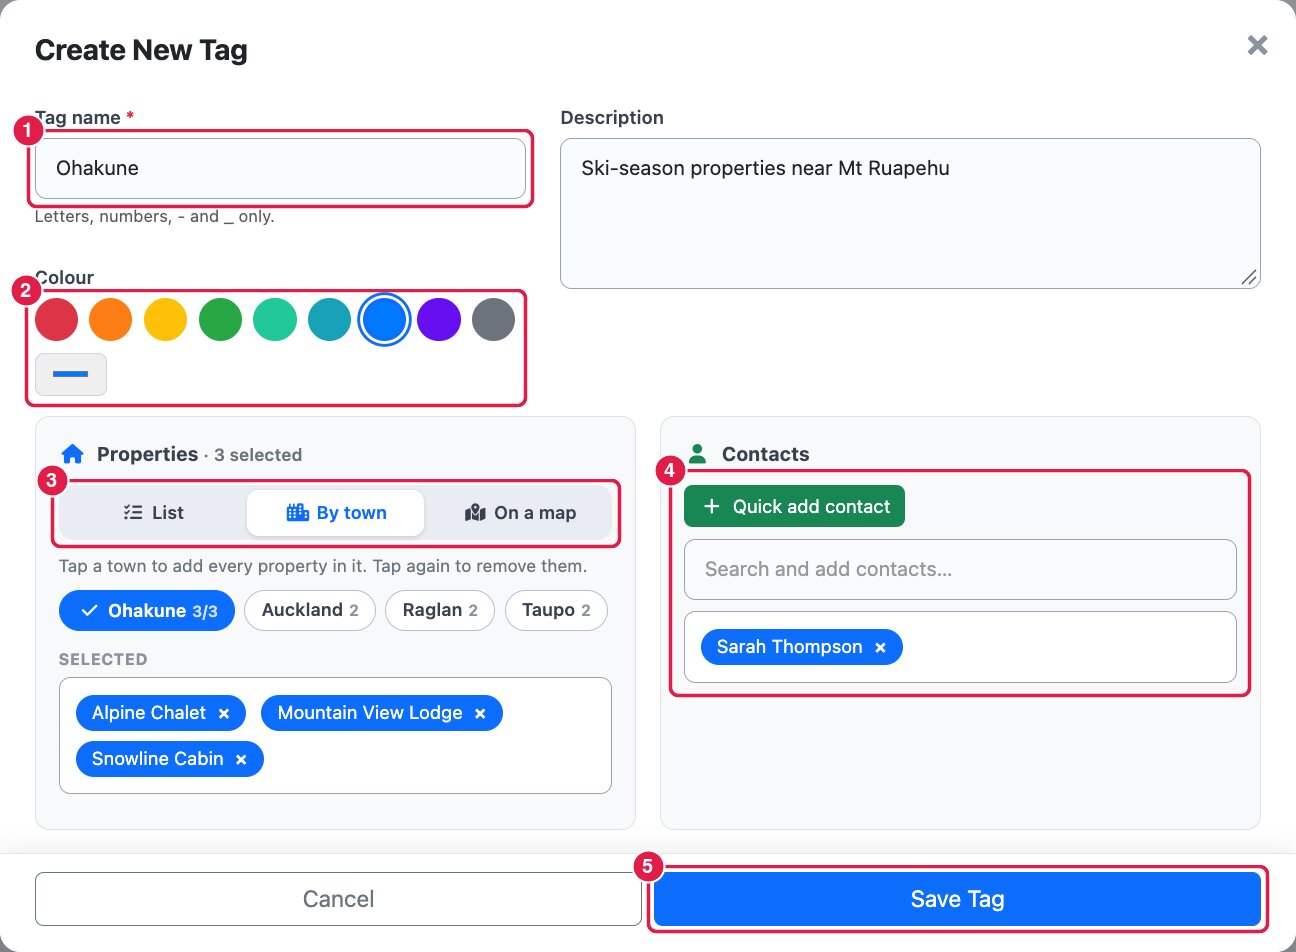
- On Tags / Grouping, click Create a tag.
- Enter a Tag name (1). Names can use letters, numbers,
-and_only, with no spaces (e.g.Ohakune,Beach_House,Joe-Smith). Add a Description if it helps. - Pick a Colour (2). The tag shows in this colour on the Tags page, the Properties list and the maps.
- Choose the properties (3) one of three ways:
- List: switch properties on one by one (there’s a filter box at the top).
- By town: tap a town to add every property in it, tap again to remove them.
- On a map: pick properties on a map (see below).
- Optionally add Contacts (4): search your existing contacts, or click Quick add contact to create one.
- Click Save Tag (5).
Picking properties on a map
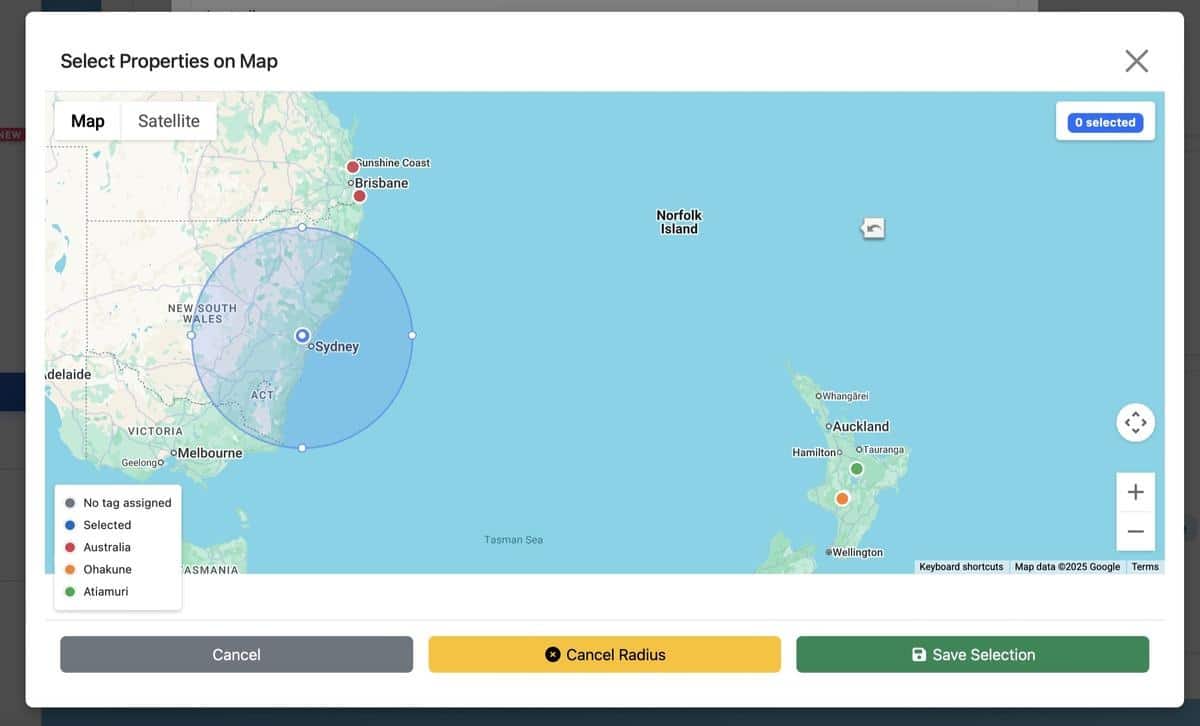
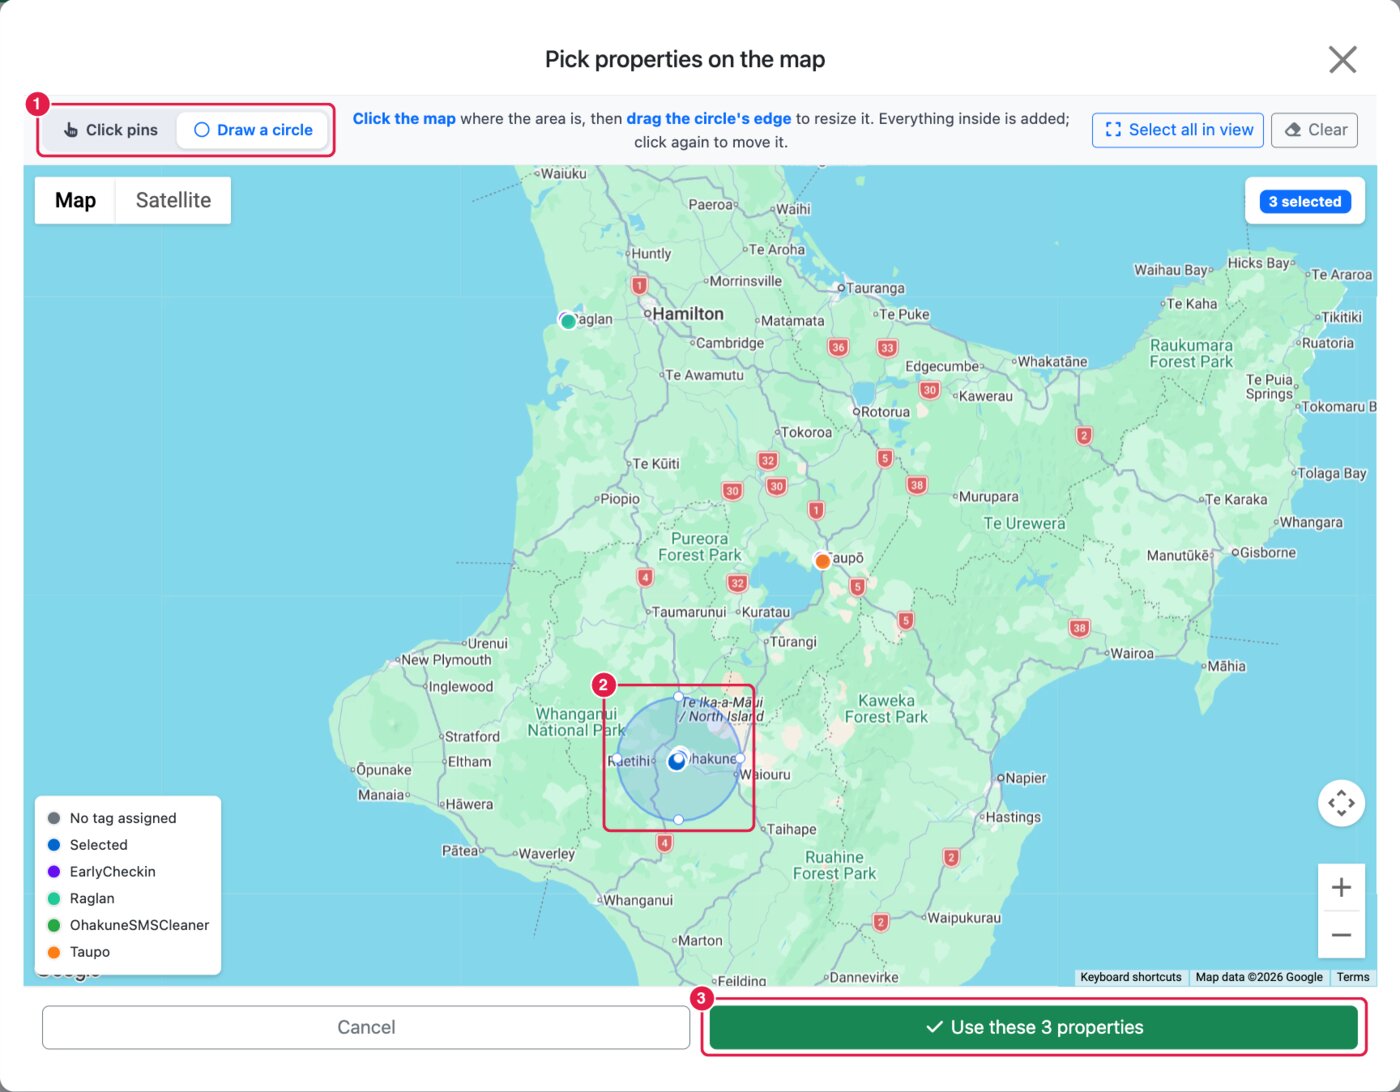
On the On a map tab, click Open map. Pins are coloured by the tag they already have.
- Choose a mode (1): Click pins adds or removes one property at a time; Draw a circle lets you click the map where the area is and drag the circle’s edge to resize it. Everything inside the circle (2) is added. Select all in view and Clear are there too.
- Click Use these properties (3) to go back to the form, then Save Tag.
Tagging contacts
A contact is linked to every property that shares one of its tags. You can add contacts to a tag from the tag form (above), or tag a contact on the Contacts page (open it from Actions → Contacts on the Tags page):
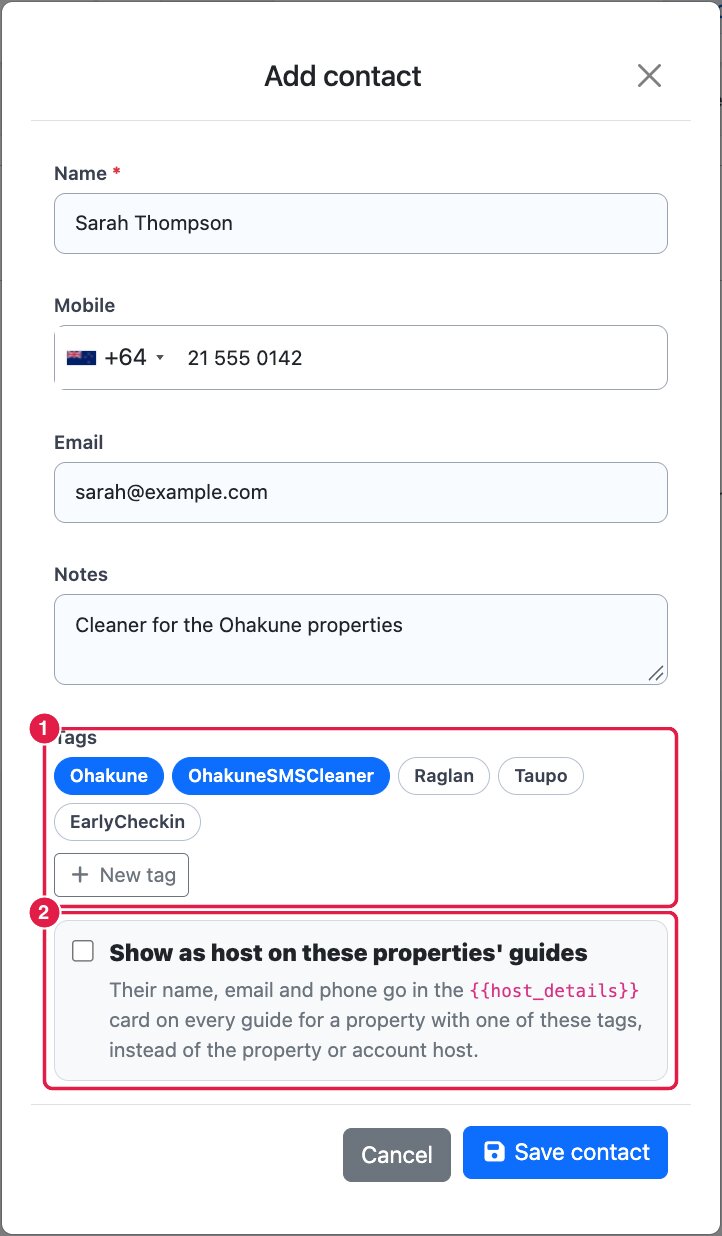
- (1) Click a tag to give it to the contact, or New tag to create one.
- (2) Tick Show as host on these properties’ guides to put this contact’s name, email and phone in the
{{host_details}}card on the guides of those properties, instead of the property or account host.
Cleaner texts
If a tag has SMSCleaner in its name (e.g. OhakuneSMSCleaner), the contacts on that tag get a text about check-ins and checkouts at the properties with the same tag. Give the tag to both the properties and the cleaners. You can check who will be texted on SMS Management.
Showing a map location on a tag’s guides
- Go to Map Locations and click Add a location (or edit an existing one).
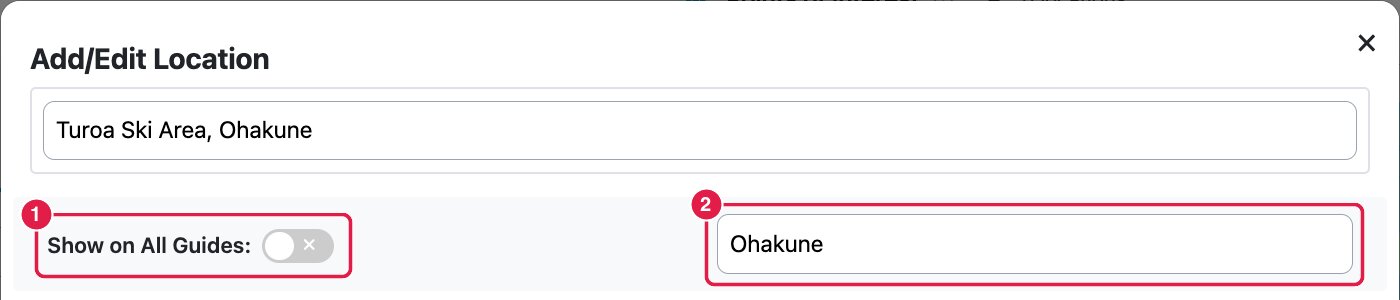
- Locations show on all your guides by default. Turn Show on All Guides off (1).
- In Search property or tag (2), pick a tag (tags are listed first) or a single property. Each location goes to one tag or one property.
- Click Save Location.
To put the same location on several tags, add it once per tag. To assign many locations at once, use Bulk update on the Map Locations page.