🧭 PMS Switch Tool Overview
When switching from one Property Management System (PMS) to another, you can safely import new property data without losing your existing guidebooks. The PMS Switch Tool makes this process simple and secure.
🔧 What This Tool Does
The PMS Switch feature allows you to:
-
Preserve existing guidebook content during a PMS migration
-
Map guides from your old properties to newly imported ones
-
Clean up outdated property data after migration
-
Maintain full control over which guides are mapped to which properties
📅 When to Use This Tool
Use the PMS Switch tool when you are:
-
Migrating from one PMS provider to another (e.g., OwnerRez → Hospitable)
-
Changing your property management system integration
-
Re-importing all properties with fresh data
🪜 How to Use the PMS Switch Tool
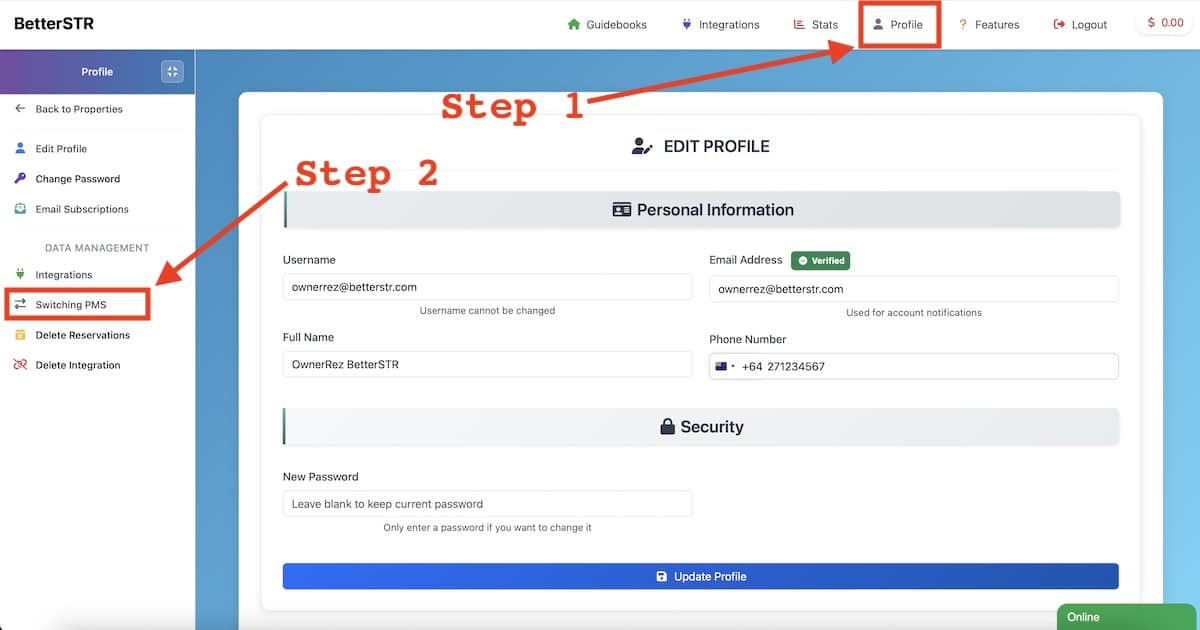
Navigate to Profile → Switching PMS to access the tool.
Step 1 – Prepare for Switch
What happens in this step:
-
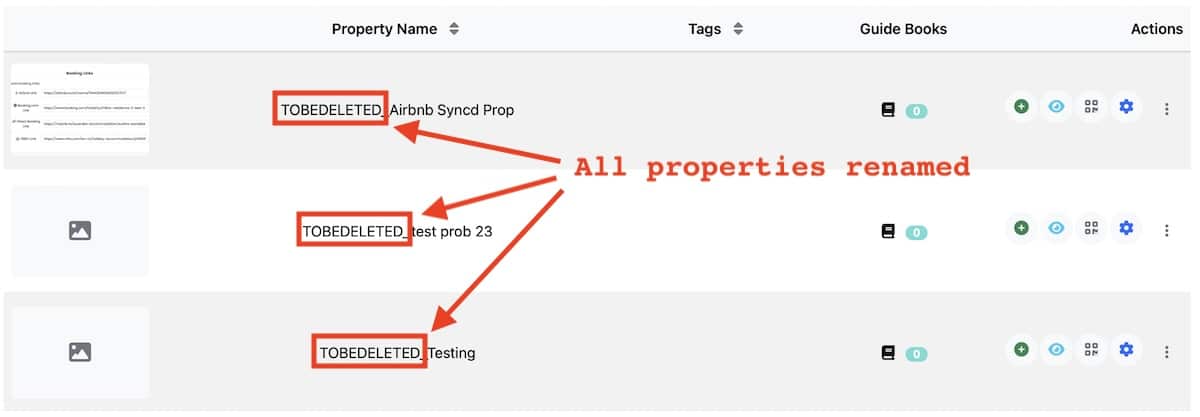
All your current properties are renamed to
TOBEDELETED_[original name] -
PMS integration settings are cleared
-
All reservations are deleted
-
Your API connection resets
-
Guidebook content remains intact for mapping in Step 2
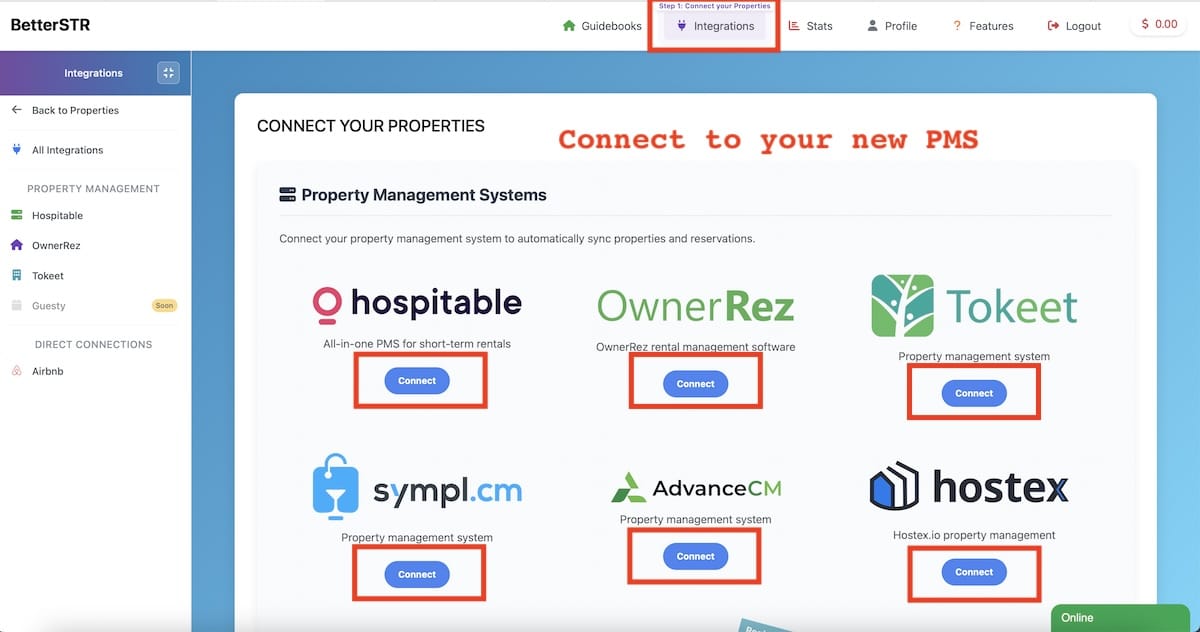
Important: After completing Step 1, reconnect to your new PMS provider and import your properties using the new integration.
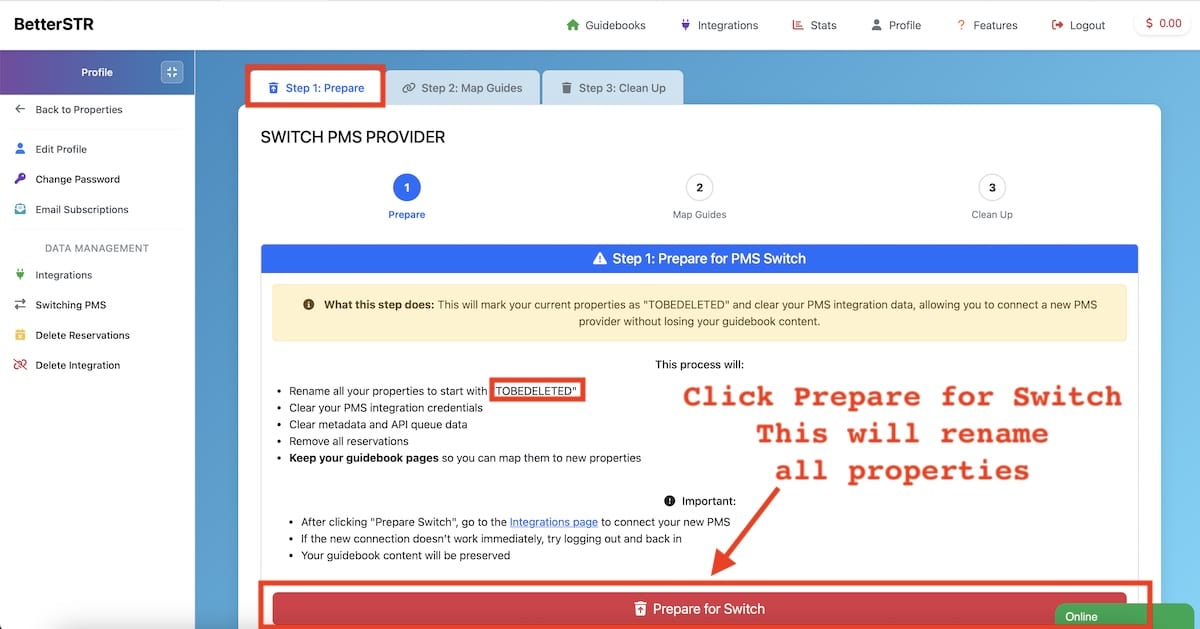
At this point you want to connect your new PMS.
Step 2 – Map Your Guides
What happens in this step:
-
You’ll see a list of your old properties (prefixed with
TOBEDELETED_) alongside your newly imported ones -
Each old property displays how many guides are attached
-
Choose which new property should receive those guides
-
Click Map Guides to transfer the guidebook content

Tips:
-
Map properties one at a time for accuracy
-
Property names may differ between PMS providers—review carefully
-
Once guides are mapped, they’ll appear under the new property
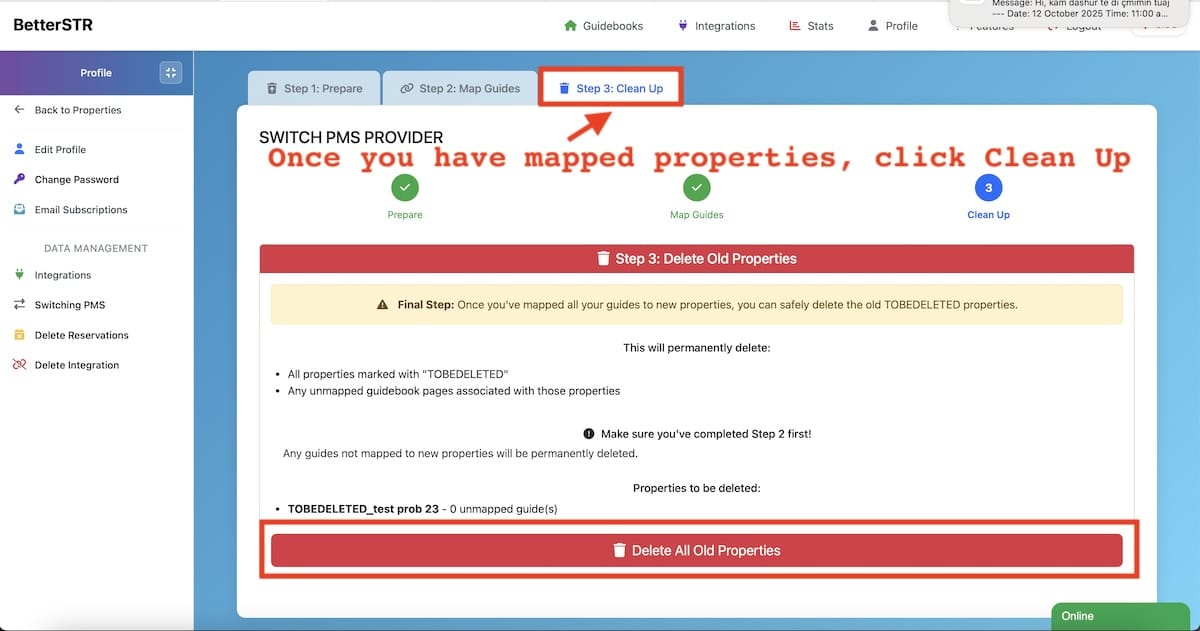
Step 3 – Clean Up Old Properties
What happens in this step:
-
Review the list of old properties still marked as
TOBEDELETED_ -
Check how many unmapped guides remain
-
Click Delete All Old Properties to remove all
TOBEDELETED_entries and any remaining unmapped guides
⚠️ Warning: This action is permanent. Confirm all important guides are mapped before proceeding.
📝 Important Notes
-
Complete steps in order — do not skip any
-
Back up important data if needed
-
Always finish mapping before deleting old properties
-
Running Step 1 multiple times won’t duplicate the
TOBEDELETED_prefix -
The process is designed to be safe but double-check guide mappings before confirming
💬 Need Help?
If you encounter any issues during the PMS switch process, contact Support before proceeding to Step 3.
Once old properties are deleted, they cannot be recovered.