Your guidebook’s look comes from three things: the layout template (Template 1 or Template 3), the theme (colours, fonts and icon style) and the home image. This article shows where each one is set and how to change it.
Where each setting lives
- Colours, fonts and icon style — in the live guide editor: open your guidebook while you’re logged in and change it right on the page.
- Layout template — Properties → Edit → Guide Template for one property, or Property Defaults → Guide Template for all of them.
- Home image — Properties → Edit → Home Image, with a default for all properties under Property Defaults → Home Image.
A setting on a property always wins over your Property Defaults. Anything you haven’t set on the property falls back to the default.
Change colours and fonts in the live editor
Go to your Properties page and open the guidebook for the property you want to style. (The Appearance section in the property’s settings also has an Open your guidebook link.) While you’re logged in as the owner, the guide shows round customisation buttons around the page on a desktop or laptop screen:
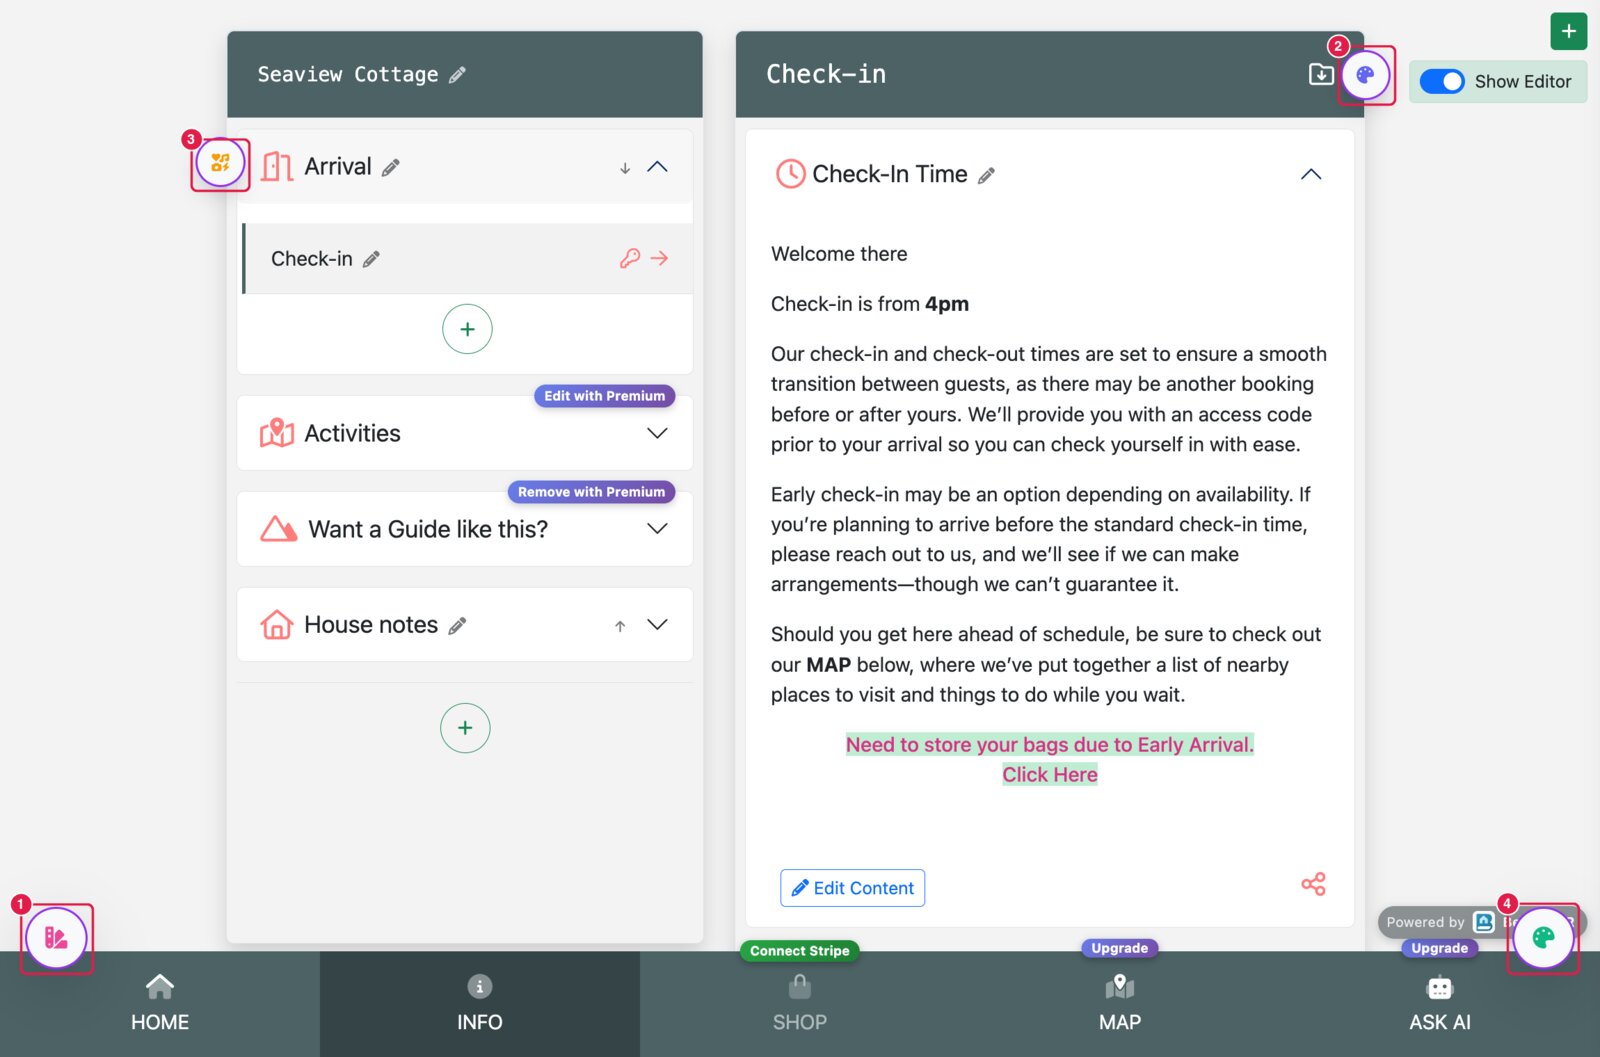
- (1) Theme Palettes (bottom left) — a library of ready-made colour schemes. One click sets every colour and icon style at once.
- (2) Header Customization (on the content header) — the header colour, the Header Font and the Body Font.
- (3) Menu Customization (beside the menu) — the colour and style of the menu icons, and the Menu Font.
- (4) Navigation Customization (bottom right) — the colour of the bottom navigation bar, its icon colour and style, and the Navigation Font.
The guide changes as soon as you pick a colour or font, so you see the result before you save. Click Save (or Save All) to keep it, or Reset to go back to the standard BetterSTR look.
Start from a palette
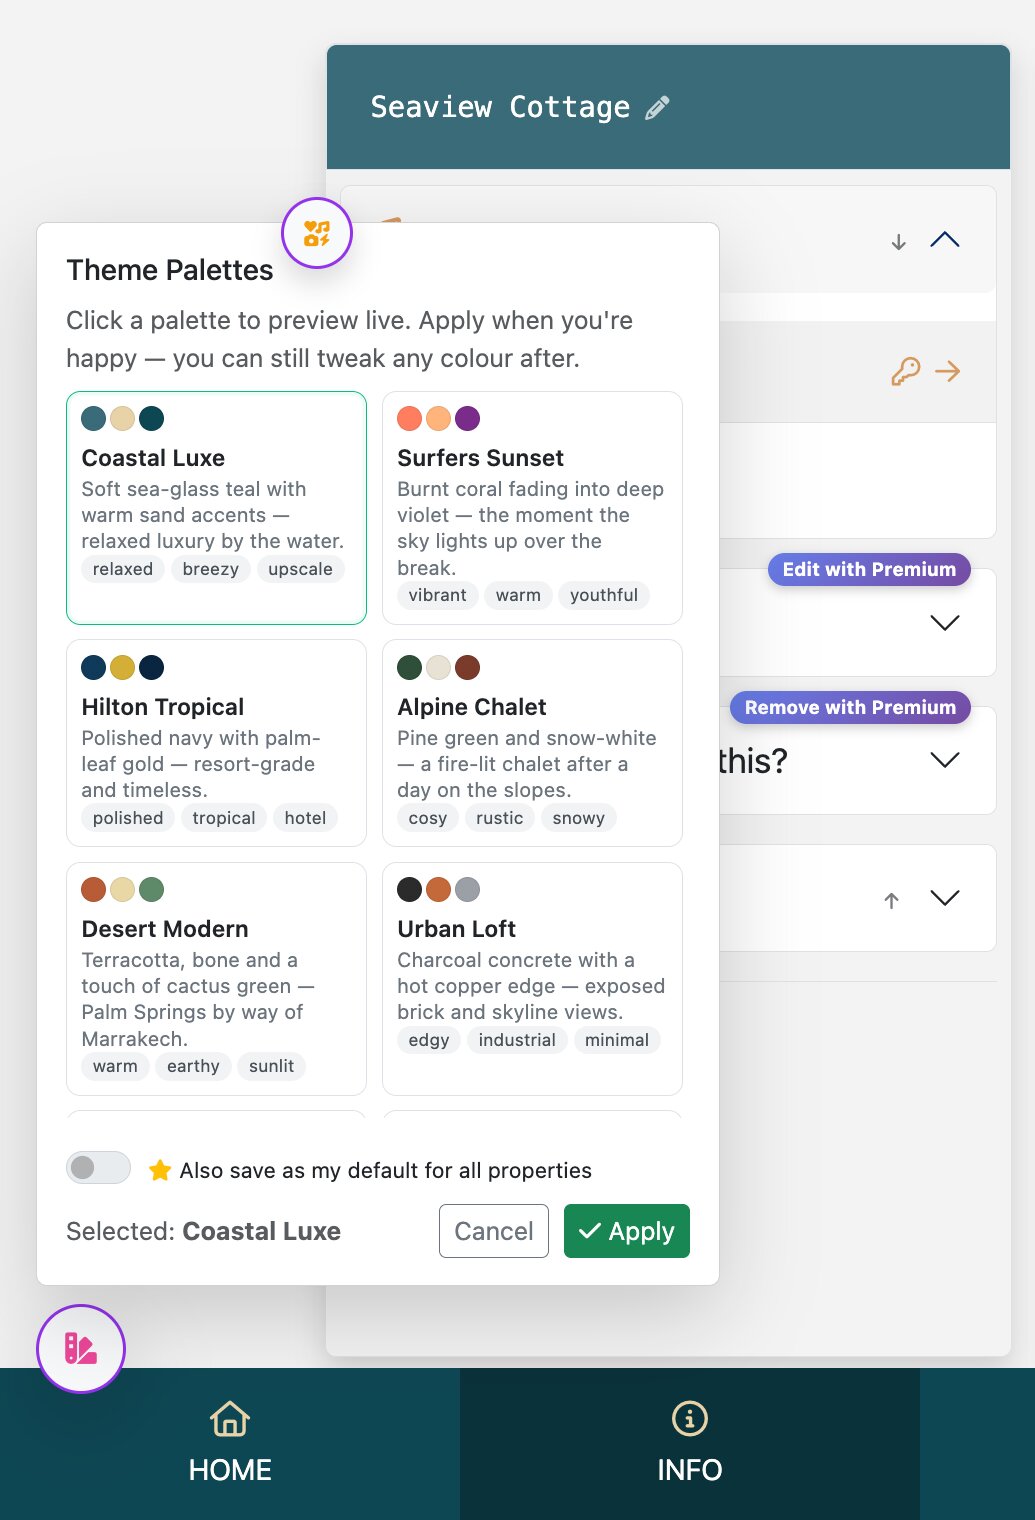
The quickest way to a polished look is a palette. Click the Theme Palettes button, then click any palette to preview it on your guide. When you’re happy, click Apply. You can still fine-tune any single colour afterwards with the other buttons. Each panel also has a Try a palette strip at the top.
Header colour and fonts
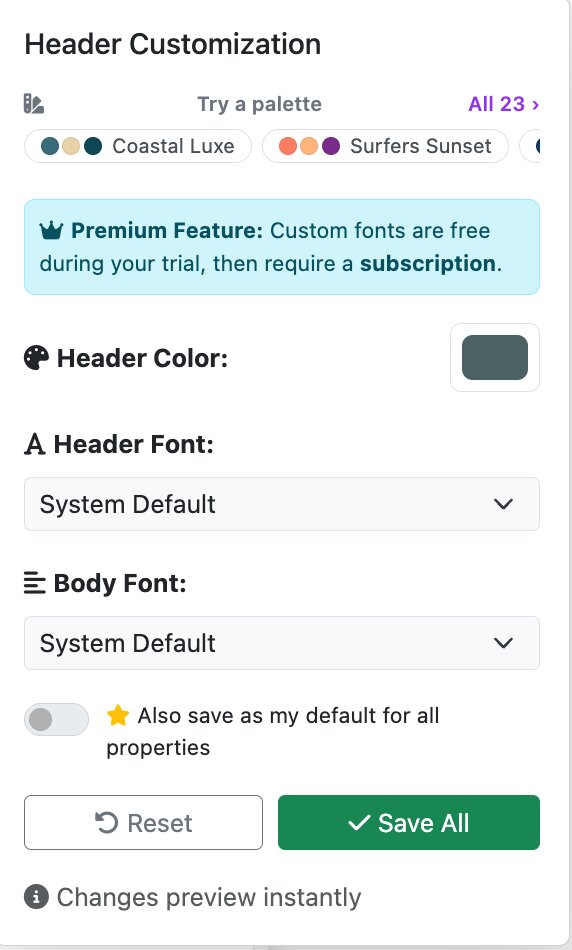
The header panel sets the header colour plus two fonts: the Header Font for titles and the Body Font for your guide text. Choose from a set of system and Google fonts, or pick Custom… (Search Google Fonts) to use any font from the Google Fonts library.
For the menu and navigation icons, see Customizing Icons and Colors.
Apply your look to every property
Changes in the live editor apply only to the property you’re editing. To use the same look everywhere, turn on “Also save as my default for all properties” before you save. This saves it to your Property Defaults, so it’s used by every property that doesn’t have its own setting. You can also set the main theme, navigation and icon colours and the icon style directly under Property Defaults → Appearance Settings.
Choose a layout template
There are two layouts:
- Template 1 (the default) — a home screen with your property image and a Get Started button, then a menu with sections and a bottom navigation bar.
- Template 3 — a single-page scrolling layout. The property name sits in a large welcome band, with every section on one page underneath.
To change the layout for one property, go to Properties → Edit → Guide Template:

- (1) Choose Use account default, Template 1 or Template 3 in the Guide Layout dropdown.
- (2) Click Preview selected to open the guide in that layout in a new tab before you commit. Only you see this preview.
- Click Save Changes at the top of the page.
To change the layout for all your properties, use Property Defaults → Guide Template. Properties set to Use account default follow it.
Styling a Template 3 guide
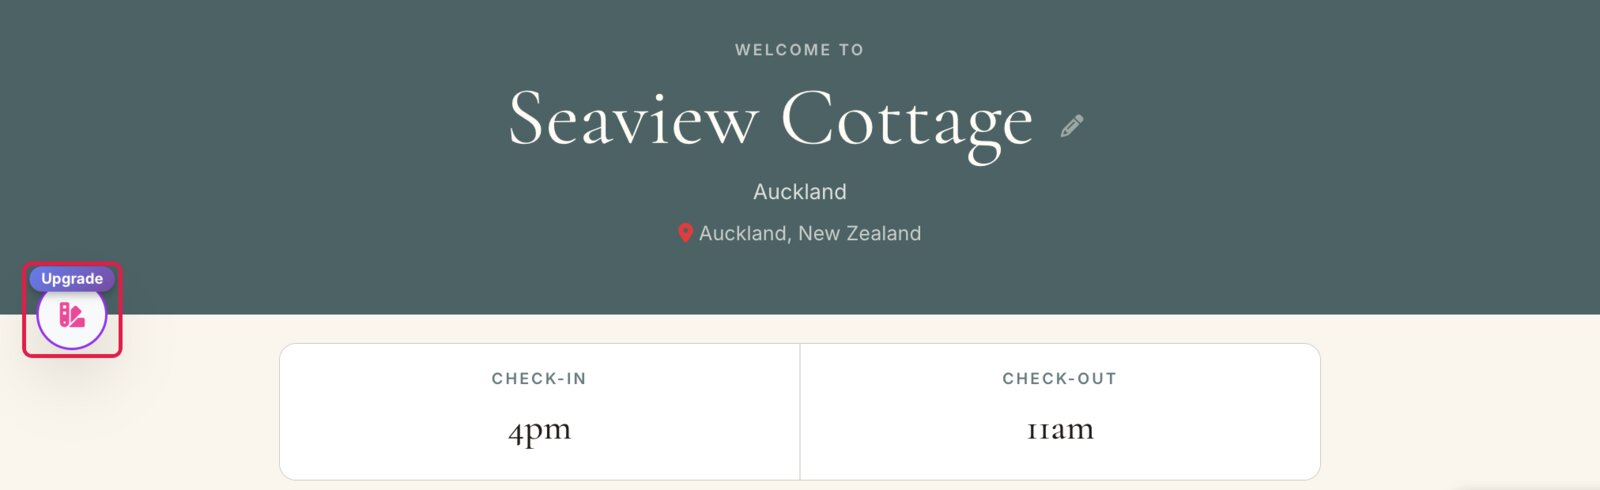
Template 3 has its own fixed typography (an elegant serif for headings with a clean sans-serif for text), so the font pickers don’t apply to it. Its colours come from your theme: the header colour becomes the welcome band and accent colour, and the palette’s link colour is used for links. On a Template 3 guide, the Theme Palettes button sits at the bottom edge of the welcome band:
Set the home image
Go to Properties → Edit → Home Image and click Change Home Image. You can pick:
- one of your listing photos from your PMS,
- Slideshow, which cycles through all your listing photos,
- Blur first image (the standard setting, and the fastest to load),
- an image from your media library, a new upload, or a free stock image.
Click Reset on the preview to go back to your default. You can set the default for all properties under Property Defaults → Home Image (Blur first image, First Image from Gallery or Slideshow).
Custom colours and fonts are a Premium feature
Anyone can change these settings, and you’ll always see your choices when you’re logged in. Guests see your custom colours, icon styles and fonts during your free trial or with Guidebook Premium. Without Premium, guests see the standard BetterSTR colours and fonts.
The customisation buttons appear on desktop and laptop screens only. On a phone, use a computer to change your theme.

